 |
| ||||||||||||||||||||||||||||
|
| ||||||||||||||||||||||||||||
Institut f�r berufliche Entwicklung e.V.
Berlin
Original title:
Lehrbeispiele f�r die berufspraktische
Ausbildung
“Arbeiten an Schleifmaschinen” (Bandschleifmaschinen)
Author: Johannes Schollbach
First Edition © IBE
Institut f�r berufliche Entwicklung e.V.
Parkstra�e
23
13187 Berlin
Order-No.: 93-33-3407/2
|
| ||||||||||||||||||||||||||||
Preliminary Remarks
The present material includes 4 instruction examples where you can train polishing of wide surfaces by grinding of different pieces of work.
The manufacturing of a good surface is the precondition for a further working on surfaces by varnishing, dulling, veneering and polishing.
To ease the preparation and realization of the exercises for each instruction example the necessary materials, machines and tools, measuring and testing means and the auxiliaries are mentioned.
The basic knowledge which is necessary to prepare and to carry through the instruction examples is mentioned, too. The working process includes the steps for the realization of the exercises.
The remarks give hints on the separate steps of the working process and on the control of the realized exercise.
Because the instruction examples are not intended to manufacture pieces of work but to trear their surfaces only, working sketches were renounced.
As instruction examples pieces of exercise were selected which after finishing will give useful things.
|
| ||||||||||||||||||||||||||||
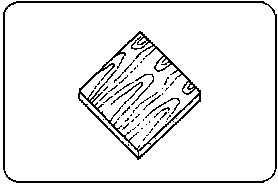
Instruction Example 07.1.: Stool Plate
The polishing of wide surfaces by grinding as a first step for further surface treatment (dulling, varnishing) is carried out on a glued board of solid wood.
Material
a glued board of solid wood
|
length: |
480 mm |
|
width: |
480 mm |
|
thickness: |
20 mm |

Figure
Machines and tools
Normal belt grinding machine, sand belt with a corundum NK 25 or NK 32
Measuring and testing means
Folding rule
Necessary basic knowledge
Manufacturing of width joints, manual wood working - polishing and grinding
|
Sequence of operations |
Comments |
|
1. Placing and fastening the sand belt with a selected corundum NK 25 or NK 32 |
Abrasives of normal corundum, abbreviation NK, are applied with the grinding of soft wood. The grain size 25 or 32 results in the necessary smoothness of the wide surface. |
|
2. Placing the piece of work and adjusting the height of the sliding table. |
The distance between the piece of work and the sand belt should be approximately 5 mm. |
|
3. Switching-on the machine. | |
|
4. First grinding |
The wide surfaces are grinded by co-ordinated movement of the sliding table cross the sand belt and the pressure shoe lengthwise to the sand belt. |
|
5. Second grinding |
Sticking out wooden fibres and remnants of previous treatment are removed by grinding. |
|
6. Switching-off the machine. | |
|
7. Checking the ground wide surface. |
Checking is carried out visually and gently rubbing over it with the hand. Thus uneven-nesses can be determined. |
Finishing
Grinding of narrow surfaces manually, chamfering the edges. Application as a stool plate.
|
| ||||||||||||||||||||||||||||
Instruction Example 07.2.: Stool Plate
Smooth and thickness grinding of the wide surfaces by grindig as the prerequisite for sticking with veneer is carried out on a fibre board.
Material
a fibre board
|
length: |
480 mm |
|
width: |
480 mm |
|
thickness: |
18 mm |

Figure
Machines and tools
Normal belt grinding machine, sand belt with a corundum EK 32 or EK 40
Measuring and testing means
Folding rule
Necessary basic knowledge
Working on circular sawing machines
|
Sequence of operations |
Comments |
|
1. Placing and fastening the sand belt with a selected corundum EK 32 or EK 40 |
Abrasives of precious corundum, abbreviation EK, are applied with the grinding of fibre boards and veneer material. The grain size is selected according to the desired surface smoothness. The fastened belt should be able to be pressed by hand only slightly. Cover the belt rollers and the upper part of the sand belt. |
|
2. Placing the piece of work on the stop of the sliding table and fixing the height of the table. |
The piece of work should sit fast with the stop to avoid a slinging off by the draft of the sand belt. |
|
3. Switching-on the machine. | |
|
4. Grinding the wide surfaces with the pressure shoe. |
Be careful when grinding the edges, the pressure shoe can topple over. Do not lead the pressure shoe to far over the edges otherwise they will be round ground. |
|
5. Switching-off the machine. | |
|
6. Checking the grinded wide surfaces |
The wide surfaces should be even and slightly rough. |
Finishing
Sticking the wide and narrow surfaces with veneer, grinding and chamfering the edges. Application as a stool plate.
|
| ||||||||||||||||||||||||||||
Instruction Example 07.3.: Stool Plate
Polishing of the veneered wide surfaces by coarse and fine grinding is carried out on a fibre board which wide and narrow surfaces are glued with veneer.
Material
a fibre board wide and narrow surfaces are glued with veneer
|
length: |
480 mm |
|
width: |
480 mm |
|
thickness: |
18 mm |
Figure
Machines and tools
Normal belt grinding machine, sand belt of medium corundum EK 25 or EK 32, sand belt of fine corundum EK 20 or EK 16.
Necessary basic knowledge
Manufacturing of boards with veneer technology
|
Sequence of operations |
Comments |
|
1. Placing the sand belt of medium corundum EK 25 or EK 32. |
Grind first the veneered surfaces with medium corundum, do not place too much pressure on the grinding shoe to prevent a grinding-through through the veneer. |
|
2. Carrying out the coarse and fine grinding on the wide surfaces. |
By this first grinding glue residues and the taping paper are ground off. |
|
3. Placing the sand belt of fine corundum EK 20 or EK 16. |
A fine corundum of the abrasive gives a smooth surface. |
|
4. Carrying out a fine or second grinding on the wide surfaces. |
Carry out coarse and fine grinding always with the grain. Be careful when going over the edges. The pressure is easy to topple over and the veneer can be ground through. |
|
5. Checking the ground wide surfaces. |
The surface should be evenly smooth and without ground hollows. |
Finishing
Polishing the narrow surfaces with a free hand grinding chunk and abrasive paper. Chamfering the edges. Application as a stool plate.
|
| ||||||||||||||||||||||||||||
Instruction Example 07.4.: Door-Frame
Polishing of the wide surfaces by coarse and fine grinding is carried out on a frame of solid wood.
Material
frame of solid wood
|
length: |
800 mm |
|
width: |
560 mm |
|
thickness: |
24 mm |

Figure
Machines and tools
Normal belt grinding machine, sand belt of medium corundum EK 25 or EK 32, sand belt of fine corundum EK 20 or EK 16.
Auxiliaries
Free hand grinding chunck
Necessary basic knowledge
Manufacturing of frame joints, manual wood working - polishing and grinding
|
Sequence of operations |
Comments |
|
1. Placing the sand belt of medium Corundum EK 25 or EK 32. |
When placing the sand belt it should not be split and not be torn at the edges. |
|
2. Grinding first the wide surfaces of the frame. Use a free hand grinding chunck. |
Be careful when grinding the narrow framing timber. The pressure shoe topples over at the edges, better to use a free hand grinding chuck here. |
|
3. Placing a sand belt of fine corundum. |
The grain size is selected according to the hardness of the material to be ground. |
|
4. Grind once more the wide surfaces of the frame. Use a free hand grinding chunk. |
By the repeated grinding the necessary smoothness for further treatment of the surface is reached. |
|
5. Checking the ground surfaces. |
The wide surfaces should be evenly polished and the traces of previous working steps must be ground off. |
Finishing
Grind the narrow surfaces manually, chamfer the edges.
Application as a door-frame for a tool
cabinet.