 |
| ||||||||||||||||||||||||||||||||||||||||||||||||||||||||||||||||||||||||||||||||||||||||||||||||||||||||||||||||||||||||
Peace Corps
INFORMATION COLLECTION & EXCHANGE T0017
Peace Corps' Information Collection & Exchange (ICE) was established so that the strategies and technologies developed by Peace Corps Volunteers, their coworkers, and their counterparts could be made available to the wide range of development organizations and individual workers who might find them useful. Training guides, curricula, lesson plans, project reports, manuals and other Peace Corps generated materials developed in the field are collected and reviewed. Some are reprinted "as is"; others provide a source of field based information for the production of manuals or for research in particular program areas. Materials that you submit to ICE thus become part of the Peace Corps' larger contribution to development.
Information about ICE publications and services is available through
|
The Peace Corps Internet Web Site address: https://www.peacecorps.gov Please note the new Peace Corps Mailing Address from July 1998 on is: ICE/ Peace Corps |
Add your experience to the ICE Resource Center. Send materials that you have prepared so that we can share them with others working in the development field. Your technical insights serve as the basis for the generation of ICE manuals, reprints, and resource packets, and also ensure that ICE is providing the most up-to-date, innovative problem solving techniques and information available to you and your fellow development workers.
SOLAR AND ENERGY CONSERVING FOOD TECHNOLOGIES: A TRAINING MANUAL
PEACE CORPS INFORMATION COLLECTION & EXCHANGE 1984 T0017
|
| ||||||||||||||||||||||||||||||||||||||||||||||||||||||||||||||||||||||||||||||||||||||||||||||||||||||||||||||||||||||||
Acknowledgments
The Solar and Energy Conserving Food Technologies Training Manual was developed by the Farallones Institute for the Energy Sector of the Office of Training and Program Support (OTAPS) under Peace Corps Contract #PC 184-1024.
Training Consultants
Laura Goldman
Community Education, Health and Nutrition
Judith Elliott
Solar/Energy Conserving Technologies
Peace Corps Administrative Support
Ada Jo Mann, OTAPS
The materials in this manual are primarily based on In-service Workshops held in Fiji, Belize and Paraguay during 1983-B4, and on the Improved Food Drying and Storage Training Manual, published by Peace Corps.
Thanks go to Peter Zweig and Steven Joyce for their work during related In-service Training programs, as well as for the materials they have developed, which have contributed to the development of this manual.
We appreciate the cooperation, support, administrative assistance (and unflagging good humor) of Peace Corps Paraguay staff during the production of this training manual.
Go in search of your people.
Love them;
Learn from
them;
Serve them;
Begin with what they have:
Build on what they know.
But of the best leaders when their task is accomplished, their
work is done,
The people all remark:
"We have done it ourselves."
(Old Chinese verse)
|
| ||||||||||||||||||||||||||||||||||||||||||||||||||||||||||||||||||||||||||||||||||||||||||||||||||||||||||||||||||||||||
Introduction to training: defining expectations and needs, clarifying goals and objectives; identifying group resources
This training manual is based on ideas and information gathered from many sources. He have relied on our own and other trainers' experiences in Pre- and In-service workshops and similar programs, as well as on books and manuals published by Peace Corps and other groups involved in community development work. The purpose of the manual is to help you as you plan and carry out In-service Training programs in solar and other energy conserving food technologies for Peace Corps Volunteers and their counterparts.
It is obvious that no two training programs are alike. Neither are any two trainers. Therefore, we think that it is important to provide you with a tool for developing a program that can be used in different ways, depending upon the specific needs and resources of the participants, the constraints of time, staffing and budget, and the many other considerations that make each training program unique, be expect that you will use this manual in conjunction with other materials to create a program that is relevant, practical and appropriate to the local setting.
In-service Training should help community workers - whatever their primary focus - learn more about potentially useful technologies and ideas, and be able to share what they have learned once the course has ended. Although the participants may come from varied backgrounds and work situations, their common goal is to motivate people toward a more healthy and self-reliant life. The technologies presented here can be used as a way of accomplishing that goal, but only when they are utilized as an integral part of the work being done in a community.
The focus of the manual is on specific technologies: the design, construction and use of solar dryers for fruits, vegetables, meat, fish and herbs (including proper storage and use of dried foods); and fireless cookers. However, training means more than the transfer of technical information. It is important that both the materials and activities included be examples of learning that is useful on the community level.
From the start of training, the participants are expected to take an active role in their own education, and to help make decisions that will enhance the learning process. They are encouraged to use the resources that exist within the training group, as well as other resources that they will find in the local community.
During training, there is an emphasis on integrating technical and non-technical information, so that the participants learn and practice how to apply what they have learned about specific technologies. A large part of the training is experiential, and is intended to guide people to solve problems individually and in cooperation with others. Such parallels to community work are essential to the success of the program.
Training should encourage creativity and self-direction. By doing so, it leads to discovery - where the kernel of real learning lies. The ideas have been planted; it is now up to you and the training participants to nurture the seed of discovery and help it grow.
PREPARING FOR THE TRAINING PROGRAM
We include the following suggestions to help you as you plan the program:
Pre-Departure
- Contact Peace Corps/Washington staff and learn as much as possible about the specifics of the program, including the amount and type of communication that they have had with in-country staff. Consult with other members of the training team, and begin to plan the program.
- Review the description of training, pre-training assessment questionnaires and other materials in the Appendices, and modify them as needed. Have Peace Corps staff in Washington send the information to in-country staff, followed by a phone call or cable at least three weeks ahead of your planned arrival in country to make sure the materials have arrived and have been distributed.
- Locate and order resources and materials. The Peace Corps Information Collection and Exchange is an excellent source of information. Find out if materials developed in-country are available. Become familiar with a variety of training materials (See Appendix, Annotated Bibliography), especially the Improved Food Drying and Storage Manual.
- Request that arrangements be made for an appropriate training site. It should have adequate classroom space, enclosed work areas for construction projects, and a place for safe storage of tools and supplies. The site should be near a community, as well as places where tools and materials can be purchased. Housing should be either at the site, with nearby families of modest means, or in other simple surroundings.
- Prepare and copy materials to be distributed to the participants. This includes handouts and information to be included in the participants' notebooks (see Session 1, "Introduction to Training").
After Arrival In-Country
Allow sufficient time before training to take care of details. You should arrive at least ten days before the course to do all the preparation that is necessary for the program to go smoothly. Begin with a good night's rest!
Meet with Peace Corps staff and clarify expectations and program details.
Meet with others on the training staff (including support staff, assistants, messengers, administrative personnel) to discuss the program and clarify roles and responsibilities for each person.
Talk with potential participants, other Peace Corps volunteers, Program Managers (APCDs), Ministry and agency representatives, local resource people. Learn as much as you can about who may be of help; in general, how to make the program most useful for the participants and their communities.
Visit PCVs sites as well as the training site and community, to learn about resources, needs and technologies currently in use.
Gather tools, materials; arrange for locally available building materials to be collected and made as soon as possible. Some materials (such as mud blocks, baskets, woven mats) may need to be ordered ahead of time, and others will need to be found.
Develop the sessions and activities. Be sure you plan the schedule to allow the participants enough time for study, reflection, recreation, construction projects, preparation for demonstrations, etc. It is important to leave room in the calendar for the changes and additions to the program that will occur based on the participants needs and suggestions. Don't forget to include evaluation time throughout the training program, including a midprogram and end-of-program evaluation. (See Appendix for Evaluation ideas)
Plan for ways to encourage the participants to take ongoing responsibilities for the course, including being on committees (See Session 1), peer teaching and sharing their skills.
Remember to use variety in the training program. People will use ideas they have found helpful in their own education. Activities should encourage cooperation and stimulate creativity.
Arrange for certificates of completion to be made for each participant to be distributed at a closing ceremony, or at the end-of training fair.
Have faith in the group. Trust that people are willing to learn and are capable of surpassing your highest expectations. You won't be disappointed!
INTRODUCTION TO TRAINING: Defining Expectations and Needs, Clarifying Goals and Objectives Identifying Group Resources
OVERVIEW AND GOALS:
In this preliminary session, the participants have the opportunity to examine their expectations of training and to clarify their perceptions about the scope and content of the program. They look at the learning needs and the resources that exist within the group, and begin to take an active role in planning and carrying out the program. An important first step is taken, as well: establishing an open and cooperative atmosphere in which to work and learn.
OBJECTIVES:
To review the planned content and approach of the training
course
To define and clarify goals, objectives and expectations
To promote
a sense of group spirit as people get to know one another
To identify the
participants' needs and skills relating to the training program
To begin to
share responsibilities for carrying out the program
RESOURCES:
In a notebook for each participant:
- a copy of the letter and description of training sent to each
participant prior to the training program (Appendix B and D)
- the proposed
schedule and a blank calendar (Appendix A)
- a brief biography of each
trainer
- an annotated bibliography and resource list (Appendix E)
- a
request form for materials, supplies and tools (Based on Appendix F)
Helping Health Workers Learn, Chapter 3, "Planning a Training Program" and Chapter 4, "Getting Off to a Good Start". (for ideas and icebreakers)
The New Games Book and Playfair (for icebreakers)
HANDOUTS:
Skills and needs assessment questionnaire (Handout
1A)
Committee Sign-Up Sheet (Handout 18)
MATERIALS:
Notebooks, paper, pens and pencils for each
participant
Newsprint and markers
A large calendar, not too detailed, with
room for additions and modifications in the schedule
PREPARATION:
Assemble a notebook for each participant, using three-ring binders, if available.
Distribute the notebooks before the first session, if possible, so that people have time to review the materials and fill out the skills and needs assessment questionnaire. If this is not possible, do this step BEFORE the activity "Clarifying Goals and Expectations."
Write on separate sheets of newsprint:
- the goals of the training program (make a list based on the
description of training);
- your expectations of the participants, and the
training norms;
- the objectives for the first session. Remember to use
language that is clear and directed toward the participants. For example, one
objective for the session might read, "To define and clarify our expectations
for the training program."
Make a list of committees and responsibilities for each, using Handout 1B as a guide.
Talk with participants who have arrived early, and enlist their help in getting ready for the first session, setting up committees, or assisting the training staff in other ways.
Arrange the chairs in a circle or semi-circle.
Make sure the room or area has somewhere to post newsprint, and a way of hanging the sheets of paper.
Post a large calendar/schedule for the course.
TRAINER'S NOTE
It is especially important at the beginning of training to establish a friendly and supportive atmosphere. Try to have all staff participate in the opening activities to promote a sense of group spirit among all in attendance. When forming small groups, remember to use a variety of methods that help people feel comfortable and not left out. The first day, there may be latecomers. Try to include them in some welcoming activities that will incorporate them into the group.
PROCEDURES AND ACTIVITIES
1. (15 minutes) Welcome and Icebreaker
Review the objectives for the first session and use the
following icebreaker or select one of your own:
Take a firm piece of fruit,
such as an apple or orange. Saying first your name, then that of another person
in the room whose name you know, toss the fruit to them. That person catches the
fruit, says their own name and the name of someone whose name they know, and
tosses the fruit.
The process is repeated until everyone has had a chance to
toss and catch the fruit.
2. (40 minutes) Clarifying Goals and Expectations
Post and review the training program goals, and explain that in order to make any modifications in the program, it is important to find out what the participants expect from the training.
Have the participants form small groups. On newsprint they should make lists that are composites of their group's expectations as well as uncertainties (or doubts) about the training program. Some questions to guide the discussion are:
- What do you hope to learn in this course that does not appear
on the posted goals list?
- What are you most eager to learn in this training
program?
- Are there goals on the posted list that you are not in agreement
with? Which ones?
- What are some positive things that might result from this
training program?
- What doubts or uncertainties do you have about the
course?
Post the trainers' expectations and norms far the training course. When the groups re-assemble, ask them to post the lists and have a group member summarize each discussion.
Compare and contrast the hopes, expectations and doubts of the participants with the stated goals of the training program, as well as with the trainers' posted lists of expectations and norms.
Discuss any differences, and come to agreement with the group about the content, scope, schedule and norms for the program.
Explain that it is possible to make some modifications in the schedule and content of the training course, based on the participants' needs, time considerations and available resources.
TRAINER'S NOTE
Remember that the participants should review the description of training and other materials before doing the clarifications activities. You may want to expand the discussion to include a more in-depth look at the course content and the approach to training, depending upon how informed the participants are.
On the basis of the preceding activities, you should have a good idea about any modifications to be made in the schedule, content or scope of the course. Work with the participants to make the needed changes.
The lists of goals, expectations, norms, hopes and doubts may be used during periodic evaluations to answer the questions: Is the program fulfilling expectations? Meeting needs? Providing a useful education? Going smoothly?
3. (50 minutes) Identifying Group Resources and Skills
TRAINER'S NOTE
If the participants have already completed the Needs and Resources Assessment Questionnaires, they may want to use them during this activity. If they have not done so, you may incorporate the completion of the forms into the activity, or ask the participants to give them to you before the next day's sessions.
Use one of the suggested activities, or use one of your own:
1. Have the participants form groups of four or five (they may want to stay in the same groups as before). They should draw a group picture that represents the different skills and resources that each person brings to the group. Some questions to guide the activity are:
- What past education, work experience, interests and special
skills does each group member bring to this training course?
- How can each
group member be a resource to the other people in the training program?
2. Have each participant select a partner whom they do not know very well. They should interview each other, focusing on the same questions as in Option #1. After the interview, each person is to make a drawing which describes their partner's skills, talents, and experience relating to the training course.
When the groups or pairs re-assemble, have them present their drawings. Review the range of skills and resources that exist in the training group, and focus on the possibilities for using the variety of abilities and talents during the course to help meet the needs of the participants.
If the questionnaires have been completed, collect them for review as well as for possible use by the planning committee in scheduling optional workshops.
4. (5 minutes) Setting up Committees
Explain the purpose of the committees, and arrange for the sign-up sheet to be posted or passed around after the session. The first meeting of each committee should occur on the first day of training, ideally during the midday break, to organize and plan.
5. (10 minutes) Summary and Closure
Explain that the success of the training course
- as a parallel to community work
- depends upon meeting the
learners' needs and on the active participation and interest of those involved.
Ask for comments regarding expectations, doubts, needs or ether aspects of training. Some questions to guide the discussion are
- Have your expectations changed since we began this
session?
- Are there some aspects of training that you were not expecting
when you arrived?
- Is there anything you've heard about training that has
not been discussed ?
- Have we met the objectives for this session?
TRAINER'S NOTE
Although it may not always be stated, you should start each session with a look at the objectives (written clearly on newsprint) and end with a review to see if the objectives were fulfilled.
SKILLS AND NEEDS ASSESSMENT QUESTIONNAIRE
We each bring a treasure of experience, abilities, skills, ideas and talents to the training program. Please take a few minutes to complete this questionnaire so that we can plan the program to meet the learning needs of each participant as well as to use the resources that exist in the group.
1. What (if any) experience have you had in the use of basic hand tools? Please be specific.
2. Do you feel capable of building a large, wooden box on your own?
3. Please indicate which (if any) food preservation methods you've had experience with, including your skill level in each.
4. What (if any) food storage methods have you had experience with?
5. What teaching experience have you had, including material development and community work?
6. Do you have some "artistic" abilities or skills? Great ideas?
7. Have you done a community assessment before? Describe please.
8. Have you participated in any other courses like this one? For example:
9. How do you think you can be a resource to the group?
10. Comments, other learning needs, hidden talents and treasures?
COMMITTEE SIGN-UP SHEET
The success of the training program depends upon the combined effort of us all. So that the responsibilities don't fall on only a few shoulders, let's try to divide the tasks and help the work go smoothly. Please sign up for one of the following committees. Each committee should have a meeting during lunch time today (a good way to get to know some new people!). Please let the training staff know if you need materials, supplies or assistance to get your job done.
Planning Committee: Work with the training staff to arrange the schedule to accommodate optional workshops, guests, activities. Provide warm-up activities, icebreakers and group energizers. Post schedule changes on the bulletin board. A member of the training staff will be included on the committee.
Site and Materials Committee: Makes sure that the area is kept reasonably neat, that materials, tools and supplies are available. Work with a training staff member to coordinate purchases as needed throughout the course.
Recreation Committee: Organize group activities and energizers, sports, games, parties. Help provide variety to keep the group's spirit and health in a positive state.
Library and Resource Committee: Organize and maintain a resource library using materials provided by the trainers, and coordinate copying of any materials requested by participants. Be in charge of distributing handouts and written materials as needed.
Food Committee: Make sure that meals and snacks served during the course are nutritious and appealing. Be in charge of organizing the kitchen area and work with others to make sure it is cleaned up at the end of each day.
Evaluation Committee: Lead discussions about how the program is going, how to improve it. Develop methods of evaluating the progress being made. A staff member will be on the committee.
|
| ||||||||||||||||||||||||||||||||||||||||||||||||||||||||||||||||||||||||||||||||||||||||||||||||||||||||||||||||||||||||
Looking at your community: the potential for solar food drying
OVERVIEW AND GOALS:
Before introducing any new technology, it is important to examine local conditions, customs and practices that determine the appropriateness of the innovation. In this session, the participants examine current methods of food preservation and storage, climatic conditions and the availability and price fluctuation of foods in their communities. By using this information it is possible to assess the feasibility of using solar drying as a method of food preservation in the participants' own communities.
OBJECTIVES:
To identify food preservation and storage methods currently used
in the participants' communities
To identify useful data on local weather
patterns
To look at the availability and price fluctuations of commonly used
fresh foods throughout the year
To use information about the participants'
communities to help determine the feasibility of solar food drying technologies
RESOURCES:
Improved Food Drying and Storage Manual, Session
4
Questionnaires included in Letters to Participants (Appendix D) for
information on local conditions and food preservation and storage practices in
their communities.
A large sample graph to show weather patterns, price
fluctuations and food availability throughout the year (based on Handout 2A).
HANDOUTS:
Examining the Factors of Leather Patterns, Food Availability and
Price Fluctuations (Handout 2A)
A Look at the Potential for Solar Drying in a
Community (Handout 2B)
MATERIALS:
Newsprint and markers
PREPARATION: (Optional)
Draw a graph or other illustration on newsprint as an example for the participants to use as they describe the climatic conditions; availability and price fluctuations of fresh food in their communities. (A sample is attached in Handout A). You may want to draw the graph as it relates to your own community.
PROCEDURES AND ACTIVITIES:
1. (10 minutes) Introduction and Warm-up Activity
Review the objectives for the session. Go around the circle of participants, and ask each person to name a favorite fruit or vegetable that is eaten in their community. As the fruits and vegetables are named, make a list of them on newsprint. Explain that the list will be the basis for the next activity, which will focus on the potential for drying fresh foods commonly eaten in the participants' communities.
2. (45 minutes) food Availability, Price Fluctuation and Weather Patterns
Describe the activity: In order to help determine whether (and if so, when) solar food drying is feasible in the participants' communities, it is useful to look at data on the availability and cost of food at different times of the year, as well as the climatic conditions that exist in a particular region. One way of analyzing that information is to look at it graphically.
Show an example of a graph or chart based on data from a chosen region, and discuss the information represented.
Have the participants form groups according to region or community, and draw a large graph which represents the three factors throughout the year. (See Handout 2A for guidelines). As they complete the drawing, ask them to consider the following questions and information:
- What problems are there in your region or community relating to nutrition, health, crop loss and food waste?
- What methods of food preservation are currently used? Are any of the foods on the graph currently preserved? If so, how? What are same of the advantages and disadvantages of these methods?
- What does the graph tell us about the potential for using solar drying as a method of food preservation? (Remember that it is important to have at least 4 hours of sunlight a day, unless you will use a back-up system).
- What time of year is best to dry food in your region?
- Which foods are likely to be the ones that can be dried? Why?
3. (45 minutes) Discussion
When the large group reassembles, ask each group to post their graph and have a group member describe the information they have recorded and analyzed.
Guide a discussion about the questions and considerations examined during the small group activity in Step 2. Look at the list of fruits and vegetables, and see which ones are available for drying during the course.
4. (20 minutes) Summary and Transition to the Community Assessment (Session 3)
Discuss: How can we use the information we now have to design solar dryers? Have your ideas or perceptions changed about the possibility of solar drying in your community or region?
What are some factors we should examine before determining whether solar food drying is an appropriate technology in a particular community?
How can we find out the information we need?
How can solar drying help alleviate problems of health, crop loss and food waste in your community?
Distribute Handout 28 for the participants to use both during the next session (Identifying Community Needs and Resources) and in their own communities.
Examining the factors of weather patterns, food availability and price fluctuations
To make a graph:
1. List 3-4 each of the most commonly eaten fruits and
vegetables on the left side of the graph.
2. List the months of the year
across the top.
3. Show what the weather is like for each month: Is it rainy
most of the time? Is there intermittent rain and sun? Is it sunny almost every
day? Is there no rain at all?
4. Show the availability and the price of the
different foods during various times of the year: is there a glut? abundance?
available, but expensive? not available at any price?
Use the drawing below to help you, or make your own graphic.

Figure
Some information this graph gives us is:
1. The wet season is during January, February, November and
December.
2. There is intermittent sun and rain during March, April, Sept.
and Oct.
3. There is a lot of sun from May through Aug.
4. Carrots are
cheapest in March; available, but mare expensive until August.
5. Apples are
plentiful in August through October.
6. A good time to dry carrots would be
starting in March; carrots from Aug. through Oct.
7. Solar drying with a
back-up system would be a possibility in Aug. through October for apples.
A LOOK AT THE POTENTIAL FOR SOLAR DRYING IN A COMMUNITY
Use these questions to help you determine whether solar drying is an appropriate technology for a community:
1. What foods are commonly dried?
2. What time of year does
drying take place for each food?
3. How long does it take for each food to
dry under sunny conditions? Cloudy conditions?
4. What problems are there
with the traditional methods of drying?
5. What are the local tests for
dryness?
6. How is each food stored when dry?
7. How long does each food
last in storage? a. Are there problems encountered with storage of dried
food?
9. Are there problems related to nutrition in the community?
Specify.
10. Are there problems of food waste during times of abundance?
Specify.
Other questions?
|
| ||||||||||||||||||||||||||||||||||||||||||||||||||||||||||||||||||||||||||||||||||||||||||||||||||||||||||||||||||||||||
Identifying community needs and resources
OVERVIEW AND GOALS:
One of the most important and challenging aspects of community work is to learn about local problems and traditions before proceeding with a project. This session gives the participants an opportunity to visit a community and examine the potential for solar drying, as well as to practice methods for gathering and presenting information about the particular needs and resources that exist in relation to food preservation and storage.
OBJECTIVES:
To examine problems and needs in a local community that relate to food preservation and storage
To identify resources, traditions and practices related to food preservation and storage
To identify and analyze weather patterns, food availability and price fluctuations throughout the year in order to examine the potential for solar food drying in a community.
To practice methods of gathering, organizing and presenting information about a community
To work cooperatively in a group to complete a task
RESOURCES:
Bridging the Gap, p. 21 and pp. 34-35
Helping Health Workers
Learn, Chapters 13 and 26
Improved Food Drying and Storage Manual, Session 3
HANDOUTS:
Examining the Potential for Solar Drying in a Community, Handout
2B
Guidelines for a Community Assessment, Handout 3A
MATERIALS:
Newsprint, markers or other materials for making
maps
Notebooks and pens
PREPARATION:
Gain permission for the participants to visit local communities or neighborhoods. Arrange for transportation,' if necessary.
PROCEDURES AND ACTIVITIES:
1. (10 minutes) Warm-up Activity and Introduction to the Session
Use the suggested activity or substitute one of your own: "I went to the village..." is a game that has many variations. It begins with one person saying, "I went to the village, and there I found " (filling in a traditional food, custom, or whatever category you have chosen). The next person repeats the item and adds another, until all have had a turn. This activity reinforces the value of tradition and helps share information about the participants' communities.
Review the objectives, and describe the activities for the session.
Explain that small groups of participants will visit local communities or neighborhoods in order to find out about needs, problems and resources relating to food preservation and storage. They will also look at the factors that will determine the feasibility of solar drying: weather patterns, food availability and price fluctuations during the year. (Refer to Handout 3A, Guidelines for Community Assessment.)
Distribute and review Handout 3A, and suggest that the participants also use the questions in Handout 2B "Examining the Potential for Solar Drying in a Community" during the activity.
TRAINER'S NOTE
It should be emphasized that a two or three-hour assessment can only give a preliminary idea of some needs and resources that exist in a community, and that the activity is not a method of diagnosing other people's problems. Its purpose is to give the participants practice in looking at the conditions, potential problems and resources that exist locally so that they can begin to analyze a community's potential for solar drying. The activity also gives the participants a chance to work in a team, and to develop skills in organizing and presenting information. If more time is needed for the community visit, preparation of reports or presentations, this session may be continued at a later time, perhaps during the second or third day of training.
2. (approximately 2-3 hours, depending upon available time) Community Assessment Activity Have the participants form groups, visit the chosen sites and prepare their reports.
3. (1 hour) Presentations
Have the groups present their reports, and discuss each presentation.
4. (15 minutes) Summary
Guide a discussion to compare and contrast the findings of each group, focusing on the following questions:
- Does it seem that solar drying is a potentially useful method
of preserving food in this area of the country? Why or why not?
- Was there
interest in solar drying or improved storage methods on the part of the
community members?
- What were some surprising things that you learned during
the activity?
- Were any of your previous assumptions about the community
true? False? Which ones?
- How do you think we can promote solar drying and
improved food storage methods locally (if there is interest and if it is
appropriate) during this training course?
- How does the community assessment
activity relate to your work and your community?
- Are the local communities
or neighborhoods similar or different from your community? In what ways?
-
What are some problems encountered as you worked with your team? How did you
deal with them?
TRAINER'S NOTE
If it is not possible to do a community visit, one option is to have the participants interview one another or other people at the training site concerning their communities, and base their reports on those findings. Another variation of the activity is to have the participants create a map of the community in which they work following the same guidelines as for the local community assessment. At the end of the presentations, post the maps that some groups have drawn for their presentation.
If only one community is available for visits, have the participants either look at different aspects of the assessment, or conduct the activity in a number of neighborhoods or outlying areas. It is interesting to compare and contrast the information found by different groups about the same location, by discussing the different perspectives and approaches that can result from such a visit.
GUIDELINES FOR A COMMUNITY ASSESSMENT
To help discover the resources and problems that exist in a community, it is useful to combine a number of methods of gathering information. This may include interviews and observations through visits to stores, markets or homes.
Plan ahead of time HOW you will gather the information (so that each group member takes an active part in the assessment). Cooperate with the people you are working with, and divide the tasks.
Decide WHAT methods you will use to present the information you have gathered.
Remember that you are a guest in the community, and that it is important to be sensitive and respectful to the people who live there. Think what it would be like if you lived there.
FOCUS on what you want to accomplish.
Remember to report what you really found, not what you wish you'd found.
Treat the community visit as an adventure and a chance to get to know people you might not have otherwise met.
WHEN YOU RETURN PLEASE PREPARE A PRESENTATION BASED ON THE FOLLOWING INFORMATION:
Traditional and current methods of food preservation and
storage
Problems related to food preservation and storage
Availability and
price fluctuations of several commonly used foods throughout the year
Weather
patterns throughout the year
Problems in the community relating to nutrition
and health
Resources in the community relating to food preservation and
storage, health, education and community education
INCLUDE IN THE PRESENTATION A SUMMARY OF:
HOW you gathered the information
WHERE you went
WHAT
recommendations you would make to improve current food preservation and storage
methods and technologies
HOW you could improve upon the assessment
YOUR PRESENTATION SHOULD TAKE ONE OF THE FOLLOWING FORMS:
1. A map of the community or neighborhood, showing some physical characteristics, problems, needs, resources - in relation to food preservation and storage.
2. A short drama or role play explaining the problems, needs, resources, etc., relating to food preservation and storage.
|
| ||||||||||||||||||||||||||||||||||||||||||||||||||||||||||||||||||||||||||||||||||||||||||||||||||||||||||||||||||||||||
Nutrition and solar drying
OVERVIEW AND GOALS:
Solar drying can help maintain and improve health by providing nutrients that might not be available during times of the year when certain foods are either scarce or expensive. However, in order to retain the most food value possible, it is necessary to follow guidelines for preparation, pre-treatment, drying and storage. In this session, the participants examine the nutritional value of some foods that will be dried, and focus on the importance of retaining vitamins during the solar drying process.
OBJECTIVES:
To identify the nutritional value of a variety of commonly eaten foods.
To examine factors which contribute to vitamin loss or retention during the process of food preservation and storage.
RESOURCES:
Putting Food By, pp. 392-403.
Village Technology in Eastern
Africa
Child Nutrition in Developing Countries
Solar Food Dryer Plans, pp.
24-26
HANDOUTS:
"Nutrition and Health Considerations in Solar Drying" Handout
4A
"Temperature Factors for Food Preservation and Storage" Handout 45
MATERIALS:
Examples of a variety of locally available fruits, vegetables and herbs that will be dried later in the training.
PREPARATION
Talk with participants who have knowledge about nutrition, and involve them in presenting the session.
Base your selection of food to be dried on the list of commonly eaten foods developed in Session 2.
PROCEDURES AND ACTIVITIES:
1. (10 minutes) Warm-up Activity and Introduction
Ask each participant to select one of the examples of foods and herbs you have brought to the session. In turn, each person is to describe something nutritious and delicious about the food chosen. For example: "Carrots are good for the eyes, and are delicious in soup."
When all participants have had a turn, summarize the nutritional qualities of the items described.
2. (15 minutes) Presentation of Nutrition Information
Focus on:
- characteristics of Vitamins A, C and 9 (the ones most likely
to be lost during food preservation and storage.)
- the conditions which
would contribute to either their loss or retention
Point out that the "how" of retaining vitamins will be covered more thoroughly in later sessions.
TRAINER'S NOTE
An effective way to present the information is to use a method appropriate to community education, such as a flannel board, puppets, posters or demonstration. If some of the participants have experience in teaching about nutrition, involve them in the presentation.
3. (5 minutes) Summary
Discuss any questions which may arise concerning vitamin loss
and retention.
Distribute Handouts 4A and 49 as reference material.
NUTRITION AND HEALTH CONSIDERATION IN SOLAR DRYING
Solar drying can contribute to maintaining good health, by providing important nutrients that might not be available to people during times of the year when certain foods are either scarce or expensive. However, as in any method of preserving food, there are precautions that should be taken to make sure that the food that is eventually eaten is safe to eat and of the highest possible quality.
Remember that the best foods are those that are unprocessed, fresh, local and organically grown. That is the ideal. When such foods are solar dried, they are nearly as nutritious (and can be as tasty) as in their original form. But: Remember that solar drying will not improve upon the quality of the food you've started out with. It's got to be good and clean from the start.
Food that is solar dried will retain a high proportion of its original food value, if the process is done correctly. Much of the food value will be lost if the food is exposed to too much heat, light, air and water depending on the original vitamin content. Inasmuch as solar drying depends upon heat, light and air, it is important to keep in mind some basic guidelines when preparing, as well as drying the food.
Solar drying is not a process of sterilizing food. If there were potentially harmful micro-organisms to begin with, they have a good chance of surviving the drying process. Therefore, it's important to remember: if it's not good enough to out in your mouth fresh, it's not good enough to eat when dry. The corollary to that rule of thumb is: if the equipment, utensils, trays and storage containers you use are not of food-grade quality, then neither will the food be that they touch. If you understand the WHY, then you'll understand the HON. (Please refer to Putting Food By for other nuggets of wisdom.)
Following are some tidbits about the WHY of health, hygiene and nutrition relating to solar food drying:
There are four basic causes of food spoilage: bacteria, molds, yeast and enzymes. Not all bacteria, molds or yeast are harmful: in fact, some are beneficial (as are the bacteria in yoghurt, the mold in bleu cheese, the yeast in bread or beer). As for enzymes, they are necessary for the process of ripening and maturing.
Of concern are the micro-organisms that make foods dangerous to eat. For example:
Bacteria: There is a relatively small percentage of bacteria which are pathogenic; that is, capable of causing illness. Some are extremely resistant and will survive, and even flourish in the same heat that will kill mold and yeast. The spores of such bacteria (the way they reproduce) require extreme heat and pressure to be killed. One type of particularly resistant bacteria is called Salmonella, which can survive even in frozen foods. It dies at around 60ºC (140ºF), but only if the temperature is maintained for at least 20 minutes. Salmonella is brought to us via insects, rodents, animal and human excrete and all the-things they have come in contact with, for example water and earth.
Another bacteria responsible for much food-related illness is Stapholococcus aureus. It comes from food that is prone to decomposition and has not been refrigerated. The only way of killing the Staph bacteria and the toxins they produce is to boil the food for at least an hour, or hold it at around 116ºC (240ºF) for 30 minutes. If there is any doubt about it, boil the food or dispose of it.
There is another bacteria, which although not usually a problem in solar drying, does deserve a paragraph of its own: That is C. Botulinum, the bacteria that cause botulism. These bacteria live without oxygen, so they are usually found in canned food. However, on rare occasions, they are found in other kinds of preserved Food, in the earth, and when temperatures are between 21ºC (70ºF) and 43ºC (110ºF). They are not usually found when there is less than 35% moisture content in food.
There is another type of botulism bacteria (type E) which is occasionally found in seafood. Make sure that when you are either canning, or eating canned food or seafood to watch for the following tell-tale signs:
- leaking or seeping liquid from the container or can; inflated can; mold outside or inside; bubbles in the contents; cloudy liquid; spongy or dry looking food; the color is odd; slimy or soft consistency; foul smelling. If there is any doubt, destroy the food. Don't give it to an animal, or leave it exposed where a child or pet might get to it. Dispose of it carefully. Cooking will only destroy the bacteria, but not the spores. Foods with less acidity are the most susceptible to botulism, because the bacteria survive in an alkaline environment. Something can seem to be alright, or borderline, but if you have a doubt, throw it out. Better to waste a bit of food than suffer the consequences.
Mold and yeast: These micro-organisms are in the same family, and will be put in the same category for now. They both reproduce with spores, (microscopic seeds). They appear on food when there is sufficient oxygen and moisture. The danger is that they can produce mycotoxins and aflotoxins, both of which are dangerous and should not be eaten, ever. Don't eat moldy food, except if the mold was purposely put there, as is done with certain cheeses to give a distinctive flavor. (By the way, penicillin is made from a type of mold, so don't discount the usefulness of all molds!) Mold eats the natural acid in foods, and leaves it vulnerable to bacterial invasion. Acid foods don't mold very often, although it does happen. Mold will grow when the temperature is higher than 0ºC (32ºF). It will live in colder temperatures, but it won't flourish. The growth accelerates between 10ºC (50ºF) and 30ºC (88ºF), and will slow down and die from around 60ºC (140ºF) to 88ºC (190ºF).
Generally, some percentage of the vitamins in the food are lost, either in the preparation (blanching, sulfuring), the processing (depending on the kind of dryer used, the amount of light and heat that enter), and the form of storage used. It is possible, however, to retain a certain amount of
Vitamin C when ascorbic acid is added. When drying food, more Vitamin C will be retained if blanching is not done. Apparently, sulphuring helps retain Vitamin C and A (although it destroys the 5 Vitamins). Insofar as exact amounts of vitamin loss, there is no agreement, even among those who are considered (or consider themselves) experts. What is known is that Vitamins A, 9, and C are relatively unstable in the presence of air, light and heat
- characteristics of the solar drying process. It is also known
that it is better to eat some nutrients than none at all, and the necessary
vitamins are often available in other foods
- especially if there are fresh
foods available. However, this is not always the case. So it is important to try
to preserve as many nutrients as possible.
VITAMIN C:
It is a water soluble vitamin and is destroyed by heat. It is necessary for the formation of blood vessels. This is why, when there is a Vitamin C deficiency, capillaries often burst, causing bleeding under the skin or from the gums. Vitamin C is found in most vegetables, especially those with green leaves, and in fruits, sprouts and mother's milk. The body requires around 60 mg/day. An orange has about 50 mg. Sometimes Vitamin C (ascorbic acid) it used to treat fruit before preserving it, to help prevent discoloration. In canning, up to 65% of the Vitamin C may be lost. If solar drying is done correctly, the loss may be as little as 10%, providing blanching is not done. The relative low heat of drying (compared to the heat required for canning) is responsible for the retention of the vitamin during the process.
VITAMIN A:
This vitamin is available only in foods of animal origin, and is found in egg yolk, liver, milk and milk products, and the oil from certain fish. The source of Vitamin A in fruits and vegetables comes from carotene, a provitamin that is a precursor to Vitamin A. It is found in dark green or orange colored foods, such as papaya, carrot, leafy greens, mangoes, melons. When children are malnourished, they have a difficult time absorbing Vitamin A through their intestines, which makes their health status even more precarious. If a lactating mother doesn't have sufficient Vitamin A, the child will also suffer from its lack. The Vitamin is necessary to maintain good vision and healthy skin. It is fat soluble, and is retained and lost in a way similar to vitamin C. The body requires about 4-5000 i.u./day.
VITAMIN B COMPLEX:
This is a group of vitamins whose major components are Thiamine, Riboflavin and Niacin. They are water soluble, and are lost to heat. They are necessary to utilize the carbohydrates in the body, and the required amount of the 5 Vitamins is in direct relation to the amount of carbohydrates that are eaten. That means that the more carbohydrates you eat (rice, potatoes and other staple foods in much of the world) the more 5 vitamins you need. Sulphuring can reduce the amount of C vitamins in fruits and vegetables (which don't have that much to begin with), and they are also lost in alkaline solutions. They are found in the germ of grains and cereals, in green leafy vegetables, milk, meat and legumes. If the body lacks sufficient B vitamins, problems may result in the nervous system, digestion and general mental and physical health.
ENZYMES:
These substances produce chemical changes that promote ripening and eventually, decomposition. They are relatively inactive in a cool or cold environment, and become most active between 27ºC and 49ºC (120ºF). Enzymes are controlled by heat; they begin to be destroyed at 60ºC (140ºF), unless the food is very acid, in which case the enzymes are more resistant to destruction. They can change the color, texture and taste of food. To inactivate them, the food may be blanched. They are not dangerous to your health.

TEMPERATURE FACTORS FOR FOOD
PRESERVATIONS AND STORAGE
100 ºC Blanch or steam for 20 minutes to sterilize
80 ºC Pasteurize for 10-15 minutes
60-66 ºC Desired range for indirect drying of meat and fish
57 ºC Pasteurize for one hour
38-60 ºC Good range for drying fruits and vegetables quickly, without severe loss of nutrients or color while still protecting from microorganisms and enzyme action
45 ºC Maximum temperature for brewery grain, seed grain and rice for food.
35-40 ºC Temperature range for drying herbs
35 ºC Maximum temperature for drying beans for human food
40 ºC Food can spoil on the drying racks below this temperature in a humid climate
20-30 ºC Fish will cook in this range in direct sunlight
20 ºC Maximum temperature for storing dried foods
Below 5 ºC Dried meats and fish should be stored to avoid rancidity
At 115-12C ºC, with steam under pressure, even the hardiest spores are killed in 15-20 minutes. Safe temperatures for canning lowacid foods
At 100 ºC (212 ºF) most mold and bacteria are killed rapidly
At 49-66 ºC heat resistant bacteria thrive
37 ºC - Our body temperature
28-36 ºC - Most common molds, yeast and bacteria grow best at temperatures in this range
At 0-10 ºC microorganisms begin to be active
-5 ºC - No mold or bacteria grow at temperatures below this, but most spores can survive

TEMPERATURE FACTORS FOR FOOD
PRESERVATIONS AND
STORAGE
|
| ||||||||||||||||||||||||||||||||||||||||||||||||||||||||||||||||||||||||||||||||||||||||||||||||||||||||||||||||||||||||
Solar food dryers: design theory
OVERVIEW AND GOALS:
As there is no "ideal" Solar Food Dryer (SFD), it is important that the participants be able to design a dryer appropriate to a given situation. This session focuses on design principles of the dryers and includes a look at improved sun drying as a potential first step in introducing the dryers on a community level.
OBJECTIVES:
Review the history, advantages and disadvantages of both
open-sun and solar drying as methods of preserving food
Review optimal
conditions for drying
Discuss Solar Food Dryer design principles
Discuss
how to correct potential problems with the dryers
RESOURCES:
"Brace Research Institute Dryer Survey" "Preserving Food by Drying" "Proceedings of Solar Dryer Workshop, Manila" "Drying Foods in the Tropics" "Small Farm Grain Storage"
MATERIALS:
A variety of dehydrated foods for sampling Newsprint, markers and easel Incense and matches Cardboard (combination model) Solar Food Dryer SFD Slide Show (available from Farallones Institute; see address in resource list) - showing a variety of SFD designs, slide projector and screen
HANDOUTS:
Solar Food Dryer-Design Criteria (Handout 5A)
Solar Food
Dryer Sizing: Rules of Thumb (Handout 5a)
PREPARATION:
Build cardboard SFD model.
Prepare slide show, pictures or
drawings of a variety of SFD designs.
Arrange the dried foods in a way to
make sampling by the group convenient.
PROCEDURES AND ACTIVITIES:
1. (20 minutes) Introduction
Make the dehydrated food samples available to participants so they can learn about the wide variety of foods that may be dried, as well as observe their taste, texture and appearance. Follow the sampling with a discussion of people's reactions to the dried foods, both before and after sampling.
TRAINER'S NOTE
This activity may be done either at the beginning of the session or during a break half way through for a more efficient use of time.
2. (25 minutes) Comparing Open-Sun and Solar Drying
Stimulate discussion regarding the difference between open-sun and solar drying, and what experience the participants have had with either method.
Briefly review the history of drying, emphasizing the fact that sun drying is one of the oldest methods of food preservation, while solar drying is a relatively new and developing technology.
Ask participants for their ideas regarding the advantages and disadvantages of both methods, and record the list on newsprint. Guide them in completing the list if necessary!
Discuss why dehydration is an effective method of preserving food. What actually happens in the drying process?
3. (10 minutes) Optimal Drying Conditions
Guide the group to identify the optimal drying conditions: heat, air flow, and dry air. An analogy may be drawn between those and the most desirable conditions for quickly drying a load of wash hung out on the line.
4. (25 minutes) Design Principles
Give examples of how the optimal drying conditions are achieved by the following design principles:
Greenhouse effect (heat) Absorbent colors (heat) Chimney effect (airflow) Low relative humidity/high temperature (dryness)
TRAINER'S NOTE
A drawing of a house with a shed roof, glazing only on one wall (the low wall facing the sun), dark interior walls, and high and low windows may be used to illustrate the four relationships. The smoke from burning incense may be used to illustrate the chimney effect.
Once the participants understand how to achieve the conditions for drying, using the example of the house, discuss the relationship between that example and "a small scale model" (or solar food dryer).
5. (15 minutes) Components of a SFD
Use a SFD model to familiarize people with the names for different parts of the dryer. Attach a prepared label to each part as it is named to help in remembering the terms.
TRAINER '5 NOTE
At this point participants should have a basic understanding of the purpose or use of each part, but emphasize that the objective now is merely to identify the parts and that the use and design of each component will soon be discussed in detail.
The following parts should be included:
Drying chamber
Drying tray
Glazing
Collection
area
Vents (upper and lower)
Access door
Solar preheater
Absorber
surface
6. (15 minutes) Three types of SFD's
Using the SFD model, illustrate the direct, indirect and combination design possibilities. Ask people what the main advantages and disadvantages of each are so that they understand the application of the three different dryer types.
7. (45 minutes) Design Criteria
Using the Handout on SFD Design Criteria (Handout 5A), discuss the guidelines for design and construction of each component. Through ongoing questioning, determine that the participants understand the reason for each criterion.
8. (20 minutes) Sack-Up Heating
Ask for ideas of methods that might work for back-up heating during cloudy weather. This might include: - bringing drying trays inside near a stove; - placing the trays inside a stove with the door left partly open; using wood-fired dryers; - using electric dryers
Ask for comments about the advantages and disadvantages of each.
TRAINER'S NOTE
The extent to which back-up dryers are needed in each area of the country should be linked to the work done in session 2 "Identifying Community Needs and Resources: assessing the potential for solar drying..."
9. (25 minutes) SFD Sizing: Rules of Thumb
Distribute and discuss SFD Sizing: Rules of Thumb Handout 5B. Give the group several related problems to solve to make sure everyone knows how to apply the rules.
10. (10 minutes) Trouble Shooting
As a final review of the design criteria, design principles and operation of the dryers, ask what factors might be responsible for problems such as: food rotting in the dryer, condensation under the glazing material, insect invasion and scorched food. Have participants suggest ways of solving each problem.
11. (20 minutes) Slide Show
Show either slides, drawings or pictures of a variety of dryer designs and have the group analyze them from different aspects such as the advantages and disadvantages of design, appropriateness of materials used, ease of construction and use.
SOLAR FOOD DRYER DESIGN CRITERIA
DRYING TRAYS
Make them strong enough to withstand vigorous cleaning as well
as the weight of food.
Use a material that will allow good circulation of air
through the tray.
Make them of a non-toxic material (don't use galvanized or
aluminum tray material).
Design them to easily fit into the dryer.
Space
them at least 5 cm. apart.
VENTS
Maximize the difference in height between the inlet and cutlet
vents.
Maximize the width of both vents. In a cabinet dryer, make both vents
1/3 the area of the back wall.
Insect-proof the vent openings with screen or
netting.
Make a door over the bottom vent that hinges from the top
side.
Make a door over the top vent that hinges from the bottom.
Make both
doors sealable against night air.
Devise a way to maintain the vent doors
open at different angles.
DRYING CHAMBER
Should be of an appropriate size for its projected
use.
Should be of a convenient height.
The floor and walls inside the
drying chamber should be of a dark color.
ACCESS DOOR
Should be large enough for easy access to all the
trays.
Should hinge either from the side or bottom
Should be insect-proof
when closed.
GLAZING
Must be transparent.
May be two layers (with a 2-4 cm air
space in between).
Should be considered as far as its: cost strength
thickness ease of installation
Should have the correct compass orientation if
built in place.
Should have the correct angle according to the time of year it will be used. (For summer: Latitude -109; winter: Latitude +30 Q; spring, fall and year round: Latitude +10 ºC.)
SOLAR PREHEATER:
Inlet and outlet vents should be of the same size as the ones on
the dryer.
Glazing angle may be different from the one on the dryer to
maximize use throughout the year.
The absorber surface on the bottom of the
preheater should be a dark color, and preferrably made of metal.
It can be removable, but should seal well to the bottom vent of the dryer.
SFD SIZING: RULES OF THUMB
1. TRAY AREA SHOULD BE EQUAL TO MAXIMUM OF TWICE THE GLAZING AREA OF THE ENTIRE DRYER. Depending on the moisture content of the food being dried and the temperatures achieved, fewer trays may have to be used at times.
2. DRYER CAPACITY - 5 TO 10 Kg OF FOOD/M² OF TRAY AREA. This rule will give a very general idea of a dryer's capacity, and should be used according to the moisture content of the food being considered.
Example: Herbs could be figured at 10 Kg/M²
Peaches at 5
Kg/M²
|
| ||||||||||||||||||||||||||||||||||||||||||||||||||||||||||||||||||||||||||||||||||||||||||||||||||||||||||||||||||||||||
Model solar food dryer: design and construction
OVERVIEW AND GOALS:
Through the design and construction of cardboard model Solar Food Dryers (SFD's), participants will have the opportunity to utilize and experiment with the design criteria learned in Session 5 (Solar Food Dryers: Design Theory) before building their permanent dryer. The cardboard models will also enable them to begin using and experimenting with a dryer right away. In addition, each construction team will look at the dynamics of their group so that they can discover and use ways Of working on a task efficiently and cooperatively.
OBJECTIVES:
To design, construct and present a SFD model appropriate to a
specific situation.
To examine the dynamics of a group and discover ways of
promoting cooperation and efficiency.
RESOURCES:
"Brace Research Institute Dryer Survey"
"Preserving Food by
Drying"
"Proceedings of Solar Dryer Workshop, Manila"
"Drying Foods in the
Tropics"
"Small Farm Grain Storage"
HANDOUTS:
Solar Food Design Criteria, Handout 5A
Evaluation Checklist
for Solar Food Dryers, Handout 6A
A Catalog of Dryers and Stores, Handout
6B
Survey of Group Behavior, Handout 6C
MATERIALS:
Cardboard boxes of varying sizes and shapes plastic
screen
Netting
Bamboo and wood for tray frames
Black latex
paint
Paint brushes
Tin snips
Saws, hammers
Large scissors, sharp
knives
Thin wire
Clear plastic
Black plastic
Sheet
metal
Tacks
Small nails
Adhesive tape
Wand glue
String
Tin
cans
Staple guns, staples
Air thermometers
Incense and matches
PREPARATION:
Gather tools and materials, and arrange them so that they are
easily accessible during the construction process.
Make sure there is
adequate work space for each group.
Copy the "Evaluation Checklist for Solar
Food Dryers" onto newsprint, and post.
PROCEDURES AND ACTIVITIES:
1. (20 minutes) Introduction
Review objectives.
Discuss the purpose of building the
cardboard models.
Briefly review the "Evaluation Checklist for Solar Food
Dryers". Ask for and record an newsprint any additional ideas from the
group.
Remind participants to use the list as a guideline during the design,
construction and presentation of the model dryers.
Indicate what tools and
materials are available.
Stress the importance of experimenting with design
innovations while still keeping the principles of Solar Food Dryer design in
mind.
Inform the group that drawing plans of the dryer first is optional
because of the time limitation, but that the plan needs to be well thought out
and agreed on by all members of the team.
2. (3 hours; 30 minutes) Design and Construction
Facilitate the formation of work groups of 3-4 people (possibly by region).
Have each group
- decide on a real or hypothetical situation
- determine what
their design criteria will be
- design and construct a SFD appropriate to
their situation.
Remind participants that 'Solar Food Dryer Design Criteria", Handout 5A and "A Catalog of Dryers and Stores" Handout 6B may be helpful for gathering design ideas.
Circulate among the construction groups. When it appears that the design and construction phase of the activity is drawing to an end, distribute Handout 6C "Group Behavior Survey". Ask each group to spend a few minutes filling out the survey and discussing it.
3. (30 minutes) Presentations and Discussion
Reassemble the group, and have each team present their model dryer. They should describe:
- the design criteria used
- any innovations they tried
-
problems encountered and how the group dealt with them
Encourage comments and questions from the group.
Ask a representative from each group to give a "profile" of their construction team, focusing on the dynamics that characterized the design and construction session.
Guide a general discussion about ways to improve the cooperation and efficiency in work teams.
TRAINER'S NOTE
Remember that the area of group dynamics may be a sensitive one, especially if there has been friction in the construction teams, or a tendency for "strong" personalities to take over. It is important to lead the discussion in a way that encourages communication, and that it is not threatening to group members
Encourage comments and questions from the group.
( 10 Min. ) Summary
Answer any further questions regarding the dryer design. Remind participants that they can either improve on this design or start a new one for the construction of permanent Solar Food Dryers later on.
EVALUATION CHECKLIST FOR SOLAR FOOD DRYERS
Use this as a guide during the Solar Food Dryer design sessions, and for continued evaluation and modification of your dryer throughout the course.
COMPARE TO THE LOCAL METHOD FOR
- Quality
-
Simplicity
- Ease of use
- Cost
IS IT CULTURALLY ACCEPTABLE?
IS THE SIZE ADEQUATE FOR ITS PROJECTED USE?
WILL IT BE EASY TO MAINTAIN?
DOES IT USE LOW-COST AND LOCAL MATERIALS WHENEVER POSSIBLE?
DOES IT ACHIEVE THE DESIRED TEMPERATURE RANGE WITHOUT OVERHEATING?
DOES IT ALLOW FOR AN ADEQUATE RANGE OF VENT SIZE OPENINGS?
IS IT LIGHT ENOUGH TO BE EASILY MOVED IF THAT IS REQUIRED?
IS THE DRYER INSECT AND RODENT PROOF?
WILL IT STAND UP TO THE WEATHER IF LEFT OUTSIDE?
WHAT, IF ANY, DESIGN MODIFICATIONS WOULD YOU SUGGEST TO SIMPLIFY THE DRYER'S CONSTRUCTION OR USE?
Handout 6B
CATALOG OF DRYERS AND STORES
From Improved Drying and Storage Training Manual

Fig. 1 Traditional hut-roof fish
drying, Zambia

Fig. 2 Traditional drying on ground
and raised platforms, India

Fig. 3 Traditional vegetable trying
under roof eaves, Nepal

Fig. 4 Traditional sun-drying of
rice, Java

Fig. 5 Sun drying salted catfish,
Cambodia

Fig. 6 Traditional foot fryers, Kenya

Fig. 7 Traditional dryer/storage in
attic of cookhouse, Kenya

Fig. 8 Improved post-harvest air
dryer for rice, Sierra Leo

Fig. 9 Fish smoker, Ivory Coast

Fig. 10 Improved post-harvest air
dryer for rice, Sierra Leone

Fig. 12 Solar tent dryer, Philippine:

Fig. 12 Solar tent dryer, Philippine:

Fig. 13 International Rice Research
Institute solar rice fryer, Thailand

Fig. 14 Concrete drying floor with
foul weather cover, Columbia

Fig. 15 VITA solar dryer with fuel
fired rainy season dryer attached

Fig. 16 Improved air dryer/store,
Sierra Leone

Fig. 17 Solar "chimney" fryer with
pre-heater

Fig. 18 Improved air-dryer for cocoa
and coffee, Sierra Leone

Fig 19 Walk-through, plastic-covered,
solar coffee fryer, Columbia

Fig. 20 Solar cabinet dryer, Syria

Fig. 21 Plastic-covered concrete
drying floor for coffee, Columbia

Fig. 22 Plastic-covered, walk through
solar coffee dryer, Columbia

Fig. 23 Pull-out, rolling carts for
drying coffee, Columbia

Fig. 24 Solar cabinet dryer,

Fig. 25 Traditional corn barn, Ghana

Fig. 26 Traditional Gottera, Ethiopia

Fig. 27 Traditional calabash seed
stores, Kenya

Fig. 28 Improved dry-store hut, Benin

Fig. 29 Traditional muddied basket,
Chad

Fig. 30 Traditional muddied stores,
West Africa

Fig. 31 Traditional Kamba grain
store, Kenya

Fig. 32 Traditional grain store,
Kenya

Fig. 33 Traditional covered basket
store, Kenya

Fig. 34 Improved Ghana grain silo

Fig. 35 Improved muddied basket with
rat guards, Kenya

Fig. 36 Traditional Kipsigis grain
store, Kenya

Fig. 37 In the field potato clamp

Fig. 38 Yams tied to poles and trees
for drying and storage

Fig. 39 Improved potato clamp with
air circulation tube

Fig. 40 Semi-subterranean potato
storage house

Fig. 41 Improved maize crib built
from local materials

Fig. 42 Dungu, improved with rat
guards, Tanzania

Fig. 43 Traditional grain storage
basket, Ivory Coast

Fig. 44 Improved grain sack storage
inside warehouse

Fig. 45 Traditional attic storage,
Tanzania

Fig. 46 Traditional Dungu, Tanzania

Fig. 47 Traditional grain drying and
storage

Fig. 48 Traditional store improved
with rat guards

Fig. 49 Traditional raised rice
stores, Laos

Fig. 50 Traditional nkhokwe improved
with rat guards and muddying, Malawi

Fig. 51 Improved maize crib built
from local materials, Nigeria

Fig. 52 Hygenic rice store, China

Fig, 53 Improved crib built from
imported materials, Swaziland

Fig, 53 Improved crib built from
imported materials, Swaziland

Fig. 55 Air-tight brick silo,
Tanzania

Fig. 56 Maize crib, improved with rat
guards, Nigeria

Fig. 57 Metal grain tank with thatch
roof, Swaziland

Fig. 58 Imported steel grain silo,
Benin

Fig. 58 Imported steel grain silo,
Benin
Descriptions of the Dryers and Scores
Fig. 1: In Zambia, fish are split in two and placed on hut roofs in the morning. They take one or two days to dry. Placing them on the roof keeps them away from animals, children and ground dust.
Fig. 2: Drying on tarps, mats, or plastic sheets can be found all around the world. Some areas will have specially made concrete drying floors. By raising the food off the ground, using platforms, air is allowed to pass up through the food and it dries somewhat faster.
Fig. 3: By hanging vegetables (mostly onions, garlic and peppers) under the eaves on south-facing walls, the Nepalese take advantage of the sun, avoid the rain and keep their foods away from the dirt, animals and people on the street.
Fig. 4: In Java, rice is threshed soon after harvest and spread on raised mats. The children are responsible for turning the rice so that it will dry faster.
Fig. 5: Cambodians salt their catfish (which draws some moisture out of the fish and also preserves it from bacterial infection) then split them open and spread them on decks to dry.
Fig. 6: Inverted cones, made from wooden sticks, catch a large percentage of the sun's light in Kenya because that country is on the equator. The food is placed on the inside of the cone to keep it away from animals and children.
Fig. 7: By placing foods (usually grains, maize) in the attic of a cookhouse, the heat from the smoke dries the food while the smoke repels insects. The food takes on a smoke smell and flavor, which is favored by some and disliked by others.
Fig. 8: This air-dryer will hold many "ties" of rice after it is harvested so that the rice does not have to be stacked up in the field where it can easily mold. The device is made from local "bush poles" and can be covered by a thatch roof to keep off rain during the wet-season harvest.
Fig. 9: The typical "banda" or Nest Africa uses a large amount of wood to smoke a small amount of fish (usually 6kg wood per 10kg fish). Smoking dries the fish, repels insects and adds flavor.
Fig. 10: A simpler model or Fig. 3. This can easily, be set up, taken down and the horizontal poles can be carried home, loaded with "ties" of rice.
Fig. 11: The standard VITA dryer has small inlet vents near the ground and virtually no high outlet vents. It can be improved by giving it larger inlet vents and large, screened vents at either end of the single-glazed roof.
Fig. 12: The Philippines solar tent dryer is low-cost and easy to build and operate. It can be improved by making all of both ends of the dryer screened. One of the plastic sides can be made with black plastic (especially for fish).
Fig. 13: The IRRI dryer can dry 400 kilograms of paddy in three or four days, depending on the weather conditions. The outlet chimney can be made larger to improve air flow. The plastic must be replaced as it wears out (about 1-3 times/year).
Fig. 14: Coffee (or other roods) can be stirred to maximize drying. At night and in case of rain, it can be pushed under the "tent" to minimize spoilage.
Fig. 15: Here the VITA dryer has been improved with a fuel-fired "stove" attached so the smoke - and heat - travels through the dryer, under the foods and exits through the stovepipe at the other end. The smoke does not flow through the food.
Fig. 16: This improved dryer/store has a removable roof that can be placed on the "handles" at either end to increase the drying tray area. The roof can be replaced at night or during rain and the rat-guards keep away the rats.
Fig. 17: This dryer has a fairly small solar collector/preheater for the number of trays inside, out the clear sides would act to collect solar energy also, thus improving performance. In a warm climate this dryer would work well.
Fig. 18: This dryer was made totally from local materials. The trays slide out during the day and slide under the roof cover at night and during rainy periods.
Fig. 19: This dryer makes an improvement over the raised platform by covering it with plastic. Air rises up through the slatted tray bottoms, the food is raked to improve drying and there is no need to worry about rain.
Fig. 20: a small, direct-gain solar dryer with low inlet vent in front and high outlet vent in back.
Fig. 21: A variation on Fig. 19. If this dryer becomes much more enclosed, some people will refuse to enter because of the high temperatures.
Fig. 22: An interior view of a dryer similar to Fig. 19. Note the stirring rake and the storage cupboards under the drying trays.
Fig. 23: These large trays roll out from under their cover in the morning and roll back at night and in case of rain. Several levels of trays allow a large quantity of food to be dried or stored at once.
Fig. 24: Simple design, easily made from local "bush poles", with mosquito netting trays and vents, surrounded with plastic. Stands about 1-1/2 meters high.
Fig. 25: Maize is stacked neatly around the perimeter, butt out, with the majority of the cobs randomly stacked inside. The roof is lifted to remove maize.
Fig. 26: A basket, resting on a stone, covered with a thatch roof. Could be improved by raising it off the ground, muddying the basket and securing the roof to protect from birds. Rat-guards should be placed on the legs, 1m high.
Fig. 27: Calabashes come in all sizes and can be grown in just about any shape if trained early. Their shape makes them almost rat-proof and if the "fill-hole" is well-sealed, it is virtually airtight.
Fig. 28: This store could still be improved by raising it at least one meter, giving it rat-guards and a tight fitting door.
Fig. 29: Chad is a very dry place, so moisture is not that often a problem. This woven basket has been muddied and tightly sealed.
Fig. 30: Individual stores in a communal setting. These are only one meter high at the peak of the roof. Many small stores reduces risk of largescale damage.
Fig. 31: A woven basket, raised off the ground to reduce ground-moisture migration and protected by a large roof. Small entrance at top increases security.
Fig. 32: Similar to Fig. 31, cylindrical basket, raised up on rock footings, with wide, overhanging thatch roof.
Fig. 33: This store can hold 1,000 kg. of maize on the cob, which is why it is not raised too high off the ground. The door is not protected from birds or rats.
Fig. 34: This cylindrical, plastered mudblock silo rests on concrete pillars with sheet plastic between the pillars and the silo to reduce moisture migration. The ferro-cement lid is cemented into place with termite mound material.
Fig. 35: An improvement over Figs. 31, 32 and 33: raised one meter, thorn rat guards, sealed top, with tight-fitting, locking, outlet copouts.
Fig. 36: A typical maize crib or barn, for storing fielddried cobs. This one could be improved by building no wider than 1-1/2 meters to allow good air flow.
Fig. 37: Potatoes should be kept moist, cool and dark. This clamp keeps off rain and sun, but keeps the potatoes in contact with the earth.
Fig. 38: Yams store well in humid climates by being tied in the shade of trees. This method also allows for easy inspection.
Fig. 39: The clamp in Fig. 37 could be improved by adding a horizontal air tube to allow carbon dioxide to escape to minimize rotting.
Fig. 40: A large-scale clamp can be built more permanently using posts to support the insulated thatch roof. The large surface area of earth moderates the temperature and humidity inside this store house.
Fig. 41: Improving the maize crib in Fig. 30 by raising it higher and building it narrower. It could still use rat-guards and a slightly improved roof.
Fig. 42: In the book Appropriate Technology for Grain Storage, it shows how one community solved their own storage problems by fitting their large-scale dungus with rat guards and raising them off the ground.
Fig. 43: They say the shape of this basket doesn't allow rats to run up its sides but they could still run up the legs. Could be improved in at least 4 ways.
Fig. 44: When stacking bags of grain in a warehouse, keep them off the ground with bush poles or perfectly sound sheets of plastic, to reduce moisture migration from the ground (even if it's a concrete floor).
Fig. 45: The cooking fire provides smoke and heat, but the grain is still susceptible to birds and house rats.
Fig. 46: A fire could be lighted under this dungu any time the grain became moist or moldy-smelling. One type of a rainy season dryer. Needs rat guards.
Fig. 47: This cut-away view shows maize being stored and dried in the attic of this cookhouse. The thatch roof allows the smoke to filter up through the maize, then through the roof (which also preserves the thatch).
Fig. 48: Raising a traditional woven basket off the ground at least one meter, providing rat guards and a good roof substantially improved this store.
Fig. 49: These large rice stores (4-6 tons of rice per store) in Laos are fairly well protected. Rats can easily climb ladders, however, so they should be stored away from the storage areas when not in use.
Fig. 50: Traditionally, these baskets are placed on the ground, but have been improved in several ways as shown here.
Fig. 51: This crib is narrow enough, but the roof overhang is not large enough and the rat guard "sleeves" attached to the legs have been shown to be ineffective: rats can jump over them. The conical guards are improved versions.
Fig. 52: These storehouses are on a large concrete pad. An intact piece of plastic is laid down, bags of rice are stacked on the plastic and eventually covered with woven mats. The area is kept clean to keep from attracting rats. Fumigants and insecticides can be applied easily.
Fig. 53: A well-built crib. The cost could be reduced by using local materials.
Fig. 54: This airtight, wattle and daub grain store has cement plaster inside and out to reduce moisture migration. The lid is sealed with termite mud. The spout is a tin can with a tight-fitting, resealable top.
Fig. 55: This silo is similar to Fig. 34. Sitting on a stone foundation to reduce moisture and painted white or whitewashed to reflect sunlight reduces the temperature fluctuations and, therefore, condensation inside the store.
Fig. 56: Rat guards need to be at least one meter off the ground, or rats can jump over them. The vertical slat sides on this crib allow easy removal of grain.
Fig. 57: This metal silo was heating and cooling daily as it sat out in the sun, so the owners improved it by adding a thatch roof shade, or cover.
Fig. 58: These silos were imported as a development project. It was soon found that farmers could not afford them, that they heated and cooled rapidly, causing condensation and that they rusted through in three or four years.
Fig. 59: Good, wide, roof overhangs, raised high, rat guards and lots of ventilation. A crib this wide could be used to store maize only it it were field-dried or air-dried down to 13% moisture or less.
GROUP Behavior SURVEY
One way to promote cooperation in a group is to look at the role that each person takes, and then work on improving troth the level of communication and the way that the tasks are completed.
- Please respond to the survey ( you may want to do this anonymously), then form a group "profile".
- Discuss how your group can overcome problems, and get the tasks done in ways that are both efficient and pleasant.
When I am in a group, I generally: (check the statements that apply to you)
- prefer to sit quietly and listen to others
- feel quite at
ease in participating in discussion or tasks
- find myself ready for some
form of leadership role
- sometimes wish I could take over and structure the
discussion or task
- feel ill at ease
- prefer to listen awhile and then
participate in the discussion or task after
- Other (be
specific)
|
| ||||||||||||||||||||||||||||||||||||||||||||||||||||||||||||||||||||||||||||||||||||||||||||||||||||||||||||||||||||||||
Health considerations in solar drying
OVERVIEW AND GOALS:
In any method of preparing, preserving and storing food, it is necessary to follow important guidelines in order to ensure a safe, high-quality product. In this session, the participants have the opportunity to observe and learn from the results of correct and incorrect procedures in the solar drying process.
OBJECTIVES:
To examine the importance of using food-grade materials and equipment and maintaining hygienic conditions during the preparation, drying and storing of food.
RESOURCES:
Putting Food By, Chapter Z. pp. 60-62, 66, 69, 395-6,
401-2.
Village Technology in Eastern Africa
HANDOUTS:
Refer to Handouts 4A and 4B distributed during Session
MATERIALS:
Examples of food-grade and non food-grade plastic bags, drying trays and other materials that will come in contact with food to compare for suitability during preparation, drying and storage.
Examples of rotten or infested foods, especially those which have been prepared, solar dried or stored incorrectly.
PREPARATION:
Gather all the materials necessary for the demonstration. (It may be necessary to prepare the examples of food to be used several days ahead of time.)
Talk with participants who may want to help in the demonstration or explanation of health related material.
PROCEDURES AND ACTIVITIES:
1. (10 minutes) Warm-up Activity and Introduction
Pass around examples of foods which have rotted, spoiled or been infested by vermin. Encourage discussion about WHY such things have occurred.
2. (20 minutes) Demonstration of Methods and Materials to be used in the Solar Drying Process
Refer to Handout 4A: "Nutrition and Health Considerations in Solar Drying".
Include:
- examples of hygienic conditions and procedures (washing foods
well, maintaining clean equipment and utensils, keeping the dryer free from
pests, using adequate storage methods)
- information about bacteria, molds,
yeast and enzymes
- information about the importance of using only food-grade
materials.
As you demonstrate and explain the information, encourage questions from the participants.
TRAINER'S NOTE
If some of the participants have experience and knowledge about health considerations or food preservation and storage techniques, include them in the demonstration, or ask them to lead the discussion.
3. (5 minutes) Summary
Explain that the participants will have an opportunity to practice preparing and drying foods in the next session.
Discuss any questions that may arise.
Refer the participants to Handouts 4A and 4B for more information.
|
| ||||||||||||||||||||||||||||||||||||||||||||||||||||||||||||||||||||||||||||||||||||||||||||||||||||||||||||||||||||||||
The use of solar food dryers
OVERVIEW AND GOALS:
Although the dehydration process is not complex, it does require following certain guidelines to ensure a dried product of high quality. In this session, the participants begin to put the guidelines into practice.
OBJECTIVES:
To learn how to prepare foods for drying
To learn how to
operate the Solar Food Dryer during the drying process
To learn how to test
foods for drying
RESOURCES:
Putting Food By, Chapters 2 and 21.
Improved Food Drying and
Storage Manual, Session A-3.
HANDOUTS:
Preparing Food for Drying, Handout 8A Use of the Dryers, Handout 8B Tests for Dryness, Handout 8C Pre-Drying Treatment of Foods, Handout 8D Post-Drying Treatment of Foods, Handout 8E
MATERIALS:
Newsprint
Markers
Model Solar Food Dryer 5-10
Cutting
hoards 10-20
Paring Knives
Variety of fruits and vegetables, meat, fish
and herbs (both fresh and dried) Lemons
5-10 Small plates
Metal
tray
Fork
Small bowl
Medium-sized cooking pot
Gauze cloth for
blanching
Metal colander
Wooden spoon
Sulfur
Small tin
can
Cardboard box for sulfuring
PREPARATION:
Prepare a tray, using a variety of foods, in such a way as to show both several right and wrong ways to load a tray for drying.
Prepare enough plates for a variety of dry food samples to have one for every 3-4 people in the group.
PROCEDURES AND ACTIVITIES:
1. (15 minutes) Introduction
Review session objectives.
Briefly discuss the importance of drying food correctly. Stress the fact that it is a relatively simple process that should generally follow the guidelines to be discussed in this session.
Discuss the necessity for each person to experiment with their dryer both during and after the course using a variety of foods under different climatic conditions, to determine what works best according to their needs and situation.
Display the incorrectly prepared drying tray to the group. Ask what people think has been done correctly and incorrectly in loading the tray, and why. Ask the group what changes they think necessary for correct loading of the tray, and discuss the reasons for making the changes.
TRAINER'S NOTE
Don't suggest any necessary corrections the group did not mention, as there will be an opportunity to do so at the end of the session on the basis of information gained.
2. (30 minutes) Solar Food Drying Guidelines
Distribute and review "Preparing Food for Drying", Handout 8A, "Pre-Drying Treatment of Foods", Handout 8D, and "Use of the Dryers, 8B questioning the participants wherever appropriate as to the importance of doing particular steps. Demonstrate the steps whenever possible as they are being discussed.
TRAINER'S NOTE
It may be helpful to have the guidelines written on newsprint and displayed so that people can easily follow the points made during the demonstration without having to refer to their handouts.
3. (30 minutes) Tests for Dryness
Give a prepared plate of dried foods to every 3-4 persons in the group. These may be used for practicing tests for dryness as each one is discussed.
Ask the participants what tests for dryness they are familiar with, either used locally or from their own experience. Record these on flipchart paper and discuss the effectiveness of each method.
Distribute and review "Tests for Dryness," Handout SC, and "PostDrying Steps", Handout BE.
Use the same procedure of demonstration and ongoing questioning during the discussion as was used in Step #Z.
4. (15 minutes) Summary
Again, present the tray of food used in the beginning of the session, and ask the participants if there are any additional corrections they think should be made in the loading of the tray, (i.e., to separate foods requiring the same temperature range for drying).
5. (30 minutes) Loading Dryers
Re-emphasize the importance of ongoing experimentation and practice with the drying process. If weather permits, have people form the same construction groups as they did the previous day to load their cardboard model dryers and correctly orient them in the sun. If the weather is cloudy, postpone this activity until the first clear morning.
TRAINER'S NOTE
It is suggested that participants gain experience with one load of food before using any of the pre treatment methods.
All materials and food for loading the dryers, including those materials that will be used in pre-treatment methods, should be made available for people to use on their own as needed throughout the course. At this point tell the participants where supplies will be kept.
Circulate among the groups to offer guidance. Occasionally ask why they are doing a particular step to make sure that they understand the principles involved.
Inform each group that they are responsible for the drying process and care for their dryer from this point on (i.e., operating the vents, bringing dryers in in case of rain, etc.).
Encourage participants to share with the group on an ongoing basis both their "successes" and "failures" in drying food. This may be done during the time set aside for presentations either at the end or beginning of each day throughout the course.
PREPARING FOOD FOR DRYING
1. Clean the trays and drying chamber as needed between
use.
2. Select produce that is firm and ripe. Over ripe food will result in a
dried product of low quality.
3. Use fresh, lean meat and fish.
4. Wash
food well. Dry immediately.
5. Peel and remove seeds from fruits and
vegetables if necessary. Try to avoid peeling whenever possible as that causes
vitamin loss.
6. Slice fruits and vegetables less than 1 cm. thick, or grate
them to the thickness desired.
7. Cut fish in half, filet, or cut into long
thin strips.
8. Slice meat 1 cm. thick, or cut into long, thin strips.
9.
Pre-treat foods if desired (see Handout: "Pre-Drying Treatment of Foods")
10.
Puree fruit and vegetables to make leather. Season to taste. Pour onto a metal
tray that has been lightly oiled or lined with food-grade plastic.
USE OF THE DRYERS
1. Load dryers evenly.
2. Don't overlap food. Leave
sufficient space for air to pass between pieces.
3. Dry strong-smelling foods
separately.
4. Dry foods together that require the same temperature range.
HERBS: 35-40ºC
FRUITS AND VEGETABLES:
38-60ºC
MEAT AND FISH: 60-66ºC
5. Load dryers early in the morning and only on clear
days.
6. Use the indirect method to avoid cooking meat and fish. Use whenever
possible with herbs to avoid loss of flavor, and with fruits and vegetables to
prevent loss of vitamins that are sensitive to light.
7. Turn foods as needed
during the drying process.
8. Rotate trays within the dryer if necessary for
a more even drying rate.
9. Operate vent doors to control temperature curing
the day. Close them in the evening to prevent dehydration from the night
air.
10. Use a thermometer to maintain the desired temperature range until
familiar with the performance of your dryer.
11. Allow food to cool before
closing vent doors or testing for dryness.
12. Keep an eye on the food as it
dries. Leaving it in too long will cause scorching and unnecessary vitamin
loss.
13. Foods will take from 1/2 to 3 days to dry. (Original moisture
content of the food, humidity of the air, amount of sunshine, and temperature
and air flow inside the dryer will all effect the rate of dehydration.)
TESTS FOR DRYNESS
FRUITS ARE CONSIDERED DEHYDRATED WITH APPROXIMATELY 20% MOISTURE CONTENT, AND VEGETABLES WITH 10-15%.
THE FOLLOWING TEST SHOULD BE USED TO DETERMINE WHEN FRUITS, VEGETABLES, MEAT, FISH AND HERBS ARE READY FOR STORAGE.
FRUITS AND MEAT:
A handful of fruit or meat when compressed should neither stick together nor leave any trace of moisture in one's hand.
It should feel leathery and flexible.
Meat may be further
dried to the point where it feels fairly stiff.
VEGETABLES:
Should feel flexible and leathery, but generally drier than fruits. Some vegetables will feel almost brittle. Pieces should fall apart after being squeezed together.
FISH:
Should retain no imprint when squeezed between the thumb and forefinger. Will feel either leathery or brittle.
HERBS:
Crumble easily when rubbed together.
PRE-DRYING TREATMENT OF FOODS
Pre-treatment of foods for drying is optional, but may he done to reduce loss of color, flavor and certain vitamins. The following four treatments are the ones most commonly used.
BLANCHING: (used for vegetables) Helps retain color, flavor, and possibly some vitamin A, C and S.
1. Prepare food for drying.
2. To blanch vegetables, place
them loosely in a basket, strainer or gauze bag.
3. Suspend either in boiling
(salted) water or in steam, for the required time (see notes below) until almost
cooked. Dip into clean cold potable water to cool, then drain thoroughly.
NOTES:
- Blanching may also be carried out be stirring the prepared
vegetables into a container of boiling water, replacing the lid and leaving for
the recommended time. Lift out with a skimmer and re-use the water for
additional batches of the same vegetable.
- Mushrooms, onions, peppers,
parsley and other herbs are not blanched before drying.
- Examples of
recommended approximate blanching times for typical vegetables:
Blanch with:
|
Vegetable |
steam (minutes) |
water |
|
Green leafy vegetables and sliced beans |
2 - 2 1/2 |
1 1/2 |
|
Squashes, cabbage |
2 1/2 - 3 |
1 1/2 - 2 |
|
Shelled peas |
3 |
2 |
|
Carrots |
3 - 3 1/2 |
3 1/2 |
|
Cauliflower |
4 - 5 |
3 - 4 |
|
Potatoes |
6 - 8 |
5 - 6 |
LEMON DIP: (used for fruits and vegetables) Helps prevent darkening; increases the Vitamin C content.
Squeeze lemon juice directly onto the prepared foods, or soak them for 5-10 minutes in a solution of 1 tablespoon of lemon juice to 1 cup of water.
SULFURING: (used for fruits)
Helps prevent browning and loss of vitamins A and C. Caution: There is some controversy about the health aspects of ingesting sulfured foods, and great care must be taken not to inhale the sulfur dioxide fumes as they can cause damage to lung tissue.
1. Stack prepared trays of food outside on the ground. Leave a space of 5-10 cm. between trays.
2. Place a small tin of sulfur (use 2 table spoons of sublimed sulfur per kilo of food. Available at pharmacies.) on the ground, 2D cm. in front of the trays.
3. Light the sulfur, and cover immediately with a sufficiently large cardboard box. (The box should have a small lower opening cut in front of the burning sulfur end en upper Opening cut on the opposite side for ventilation).
4. When the sulfur has burned completely, close the two openings and begin to time the sulfuring process.
5. Leave small pieces of fruit in for 20-30 minutes. Larger pieces may be sulfured for up to an hour. (Consult "Putting Food By", Chapter 21, for more specific times.)
6. Lift the box off, pointing it away from you.
7. Place the trays of food into your Solar Food Dryer and dry as usual.
SALTING OR BRINING: (used for meat and fish)
Both salting and brining facilitate the drying process, as the salt helps to draw cut moisture as well as inhibit the growth of microorganisms.
Salting:
1. Coat prepared pieces of fish liberally with pure pickling
salt, using about 1 kilo of slat per 2 kilos of fish or meat.
2. Stack pieces
fleshside up on a slatted wooden rack outdoors. Don't stack more than 12 layers
deep.
3. Leave for 1-2 weeks.
4. Add weights on top of the pile to
compress it as the brine is formed.
5. Wash fish to remove salt.
6. Wipe
dry, and place in the Solar Food Dryer.
Brining:
1. Prepare a brine of 2 1/2 cups of pickling salt for 3 liters
of water.
2. Soak strips of meat or fish for 1 or 2 days.
3. Remove and
wipe dry.
4. Place in the Solar Food Dryer for drying as usual.

BLANCHING
POST-DRYING TREATMENTS PASTEURIZING AND CONDITIONING
Both these steps are optional, precautionary steps which may be done to reduce the chances of dried foods spoiling during storage.
PASTEURIZING:
Food can be pasteurized after drying to kill any insect eggs and larvae that may still be present. To do this either keep the food at 57ºC for an hour, or 80ºC for 10 - 15 minutes.
Note: Use of an oven may be necessary to achieve the desired temperatures if they cannot be reached using the Solar Food Dryer.
CONDITIONING:
When drying is completed, some pieces will be more moist than others because of the size of the pieces or their location in the dryer. Conditioning is a process used to distribute the residual moisture evenly in the fruit and reduce the chance of spoilage.
After the dried food has cooled, loosely pack it in plastic or glass containers to about 2/3 full. Metal containers should be lined with paper first, as they may give an unpleasant flavor to the food. Cover the containers tightly and let them stand for 2 to 4 days.
Shake the containers daily to separate the pieces and check for signs of condensation on the lids. If condensation occurs, the fruit should be returned to the drying trays for more drying.
|
| ||||||||||||||||||||||||||||||||||||||||||||||||||||||||||||||||||||||||||||||||||||||||||||||||||||||||||||||||||||||||
The economics of solar drying
OVERVIEW AND GOALS:
One of the determining factors concerning the appropriateness of a technology is the cost in comparison to the benefits that can result from its use. In this session, the participants examine the economics of solar dryers in relation to the application of the technology in a community setting. In this way, people are able to begin planning their construction projects in light of the economic realities that exist in their own communities.
OBJECTIVES:
To examine the costs and benefits of solar dryers
To identify
factors that influence the economic viability of solar drying in a
community
To determine the approximate cost of a food dryer in each
participant's community
RESOURCES:
Improved Food Drying and Storage Training Manual, Session
14
Solar Food Dryer Plans, pp. 9-11
HANDOUTS:
"Materials and Tools List", with costs for each item indicated
(based on Appendix F)
A Question of Economics, Handout 9A
The Economics of
Solar Drying in a Community, Handout 9B
MATERIALS:
Newsprint and markers
PROCEDURES AND ACTIVITIES:
1. (10 minutes) Warm-up Activity and Introduction
Have the planning committee conduct a short icebreaker or other warmup activity. Review the purpose of the session.
2. (20 minutes) Discussion of Community Economics
Distribute Handout 9A and have the participants form small groups. Ask them to discuss the situation described in the handout, and make recommendations based on the following questions:
- What factors help determine if solar drying is economically
feasible in a local community?
- What are some specific questions to answer
before deciding on solar drying as an economically appropriate technology in a
community?
- When the groups re-assemble, guide a discussion based on each
group's recommendations.
3. (15 minutes) Examination of Costs and Benefits of Solar Dryers
Ask for suggestions as to specific costs involved in making and using a solar food dryer. List them on newsprint.
Ask for ideas about the benefits of solar food dryers. List those ideas on newsprint.
Distribute the materials and tools request forms and ask if the prices quoted are similar in the participants' communities. Discuss any price variations as well as possible reasons for the differences.
Distribute and review Handout 9B.
4. (20 minutes) Determining the Cost of a Solar Food Dryer
Ask the participants to utilize the Materials and Tools List and Handout 96 as they calculate an approximate price limit for a solar food dryer that would be appropriate to their community setting.
TRAINER'S NOTE
If the participants have already formed construction teams, they may wish to calculate costs in each group. However, individual communities within the same region may have different economic situations, so it may be helpful for the participants to concentrate on their own communities. This preliminary cost estimate will be useful during the Solar Food Dryer Design Session.
Compare the different cost estimates and discuss some reasons for each.
5. (10 minutes) Summary
Review the session,- focusing an the following discussion points:
- What makes a new technology economically viable?
- How can
a community worker cooperate best with community members to determine the best
type of solar dryer for a given situation?
- How can the information
presented in this session be used during the design, construction and use of the
solar food dryer?
A QUESTION OF ECONOMICS...
You've just arrived back in your community after attending a workshop on solar drying technologies; you are enthusiastic and ready to get back to work. As you approach your house, a group of people greet you and ask how it all went at the course. Your neighbors know you went to study some new ways of preserving food, and they are excited at the prospect of having modern technologies in the community at last. You are the "expert" now, and they are waiting to find out how you can help.
This year, it appears the tomato harvest is going to be enormous, larger than ever. The people tell you that they are worried because they have no way to store the bumper crop, and there is such a glut on the market that the village economy is in danger of collapsing if something is not done soon. They want your help in solving the problem.
You know that the people in the community are not well-off, not even what is considered "middle class". They live from harvest to harvest, with not much of a soft cushion between them and hard reality, very seldom is there extra cash for non-essential purchases.
You think about solar drying all those tomatoes, and the possibilities fur economic improvement. But, there are so many factors to consider, so many pro's and con's to introducing the new technology. How can you and your neighbors decide if solar drying is a viable plan for dealing with the tomato harvest?
ECONOMICS OF SOLAR DRYING IN A COMMUNITY
Note: To answer some of the following questions, more information will be needed both from later sessions in this course as well as from investigation within your own community. Remember to use these questions as a guide.
THE QUESTION IS: Is it economically viable to solar dry foods in my community?
THE ANSWER IS: To help you answer this question, you have to ask and answer other questions along the way ... For example:
During the year, about how many days are there with a minimum of
4 hours of strong sunlight?
Do the periods of food gluts coincide with
periods of sufficient sun?
How much money do people have available initially
to invest in the technology?
How much money is likely to be available for
maintenance and repair of the dryers?
How long is the dryer going to last? Is
it a good investment, relative to its construction and maintenance costs?
How
much do the fruits and vegetable cost during the time of plenty? When they are
scarce? When do they have to be imported?
How much of each food can be dried
in a year?
How long does it take to dry each food?
What is the capacity of
the dryer? How many kilos or pounds can it hold in a load? (Remember that a
dryer can hold about 5-10 kg per square meter of tray area.)
How much does
the food weigh dry, as compared to fresh? (Remember, generally fruit has about
80-85% moisture when fresh, and 15-20% when dry. Vegetables usually have 70-75%
moisture, fresh and approximately 10-15% when dried.)
Use these questions to come up with a formula that resembles the following:
Add up all costs: initial investment + maintenance + labor + food to be dried + any other expenses.
Add up all benefits: weight/quantity of food dried in a given amount of time multiplied by the economic value of the food + health benefits + other factors.
Compare the costs and the benefits, and decide whether it is an economically viable method for preserving food.
Now, what is the answer to the question on the previous page?
Are there other questions to be asked?
Other factors to be considered?
What are some other ways of determining whether it is economically feasible to solar dry food in a given community?
|
| ||||||||||||||||||||||||||||||||||||||||||||||||||||||||||||||||||||||||||||||||||||||||||||||||||||||||||||||||||||||||
Solar food dryers: design
OVERVIEW AND GOALS:
The importance of careful planning in the design phase of a construction project cannot be overemphasized. In this session participants learn effective methods of drawing construction plans and practice using them in the design of a Solar Food Dryer appropriate for a specific situation.
OBJECTIVES:
Learn to draw construction plans clearly
Design a Solar Food
Dryer (SFD) appropriate for a given situation
RESOURCES:
Community Assessment Reports (Session 3)
Improved Food Drying
and Storage Manual, Session 10
Simple architectural drawings (as
available)
Solar Food Dryer resource books (refer to Session 6, RESOURCES, as
well as annotated bibliography)
HANDOUTS:
"Solar Food Dryer Design Criteria" Handout 5A
"Evaluation
Checklist for Solar Food Dryer Design" Handout 6A
"A Catalog of Dryers and
Stoves" Handout 6B
"Materials and Tools Request Form'' (Eased on Appendix F)
MATERIALS:
Newsprint
Markers
Rulers
Graph paper
Pens,
pencils
Solar Food Dryer cardboard model
PREPARATION:
Prepare on newsprint at least one drawing each of a plan, section and elevation view of the Solar Food Dryer model to be used in the session.
Prepare a "Materials and Tools Request Form" based on pre-training research of what is locally available. (Use Appendix F as a guide.) The request form will be used by each group throughout the construction period to indicate what supplies they need for their project. Make the list as complete as possible, but encourage participants to make additions as needed.
PROCEDURES AND ACTIVITIES:
1. (10 minutes) Introduction
Discuss the importance of having clear and detailed drawings to work from during a construction project. Ask for examples from the group where drawings may have helped them in the past, and why. Refer to their experience in building the cardboard Solar Food Dryer models.
2. (25 minutes) Showing Construction Views
Display each of the design drawings one at a time, explaining that each one shows different views of the Solar Food Dryer model being used.
Ask the group to explain exactly what is represented in each one.
Label the drawings (plan, section, elevation) as they are discussed.
Choose a three-dimensional object in the classroom area for the participants to quickly draw in each of the three views just discussed.
Circulate and offer people help as they work, if needed.
Ask for a volunteer to draw the three views on newsprint, and discuss them.
Clarify any questions at this point, either about what each view represents and how to draw them, before proceeding to the next step.
3. (20 minutes) Showing Measurements and Scale
Discuss why it is important to show accurate measurements in a construction plan. On newsprint, show several examples of which specific parts in a design it is important to show measurements as well as how to most clearly represent the actual measurements.
Discuss the importance of using scale in a design plan. Give an example on newsprint of how to correctly represent scale. Ask what a convenient scale would be for representing the Solar Food Dryer model on display, and why.
Clarify any questions people may have regarding how to show the three design views discussed.
4. (2 hours; 45 minutes) Design of Solar Food Dryers
Distribute "Materials and Tools Request Form", Handout 1OA.
Prepare the group for the design session by discussing the following points:
- purpose of designing and building the dryers
- the most
useful way of dividing the group into work teams
- the importance of taking
enough time in the design phase
- what low cost, locally available tools and
materials might be used (refer to "Materials and Tools Request Form")
- what
handouts and resources (listed under RESOURCES) may be helpful in this session.
TRAINER'S NOTE
Stress the fact that the resources may be used for ideas, but that the participants should develop an original or innovative design appropriate to their particular situation.
Post and discuss the following "Flow Chart" for them to use as a guideline in the design stage:
- form small construction groups
- list design criteria
-
decide on the design that best meets those criteria
- make detailed drawings
of the design, showing all necessary views, scale and measurements.
- make a
list of all tools and materials needed, using Handout 10A
- determine the
cost of the dryer
- have the design approved by one of the trainers
Facilitate the forming of work teams. Distribute rulers and graph paper.
Circulate among the groups, asking questions when appropriate, and offering constructive criticism. Encourage originality of design, rather than the copying of an existing design.
5. (20 minutes) Summary
At the end of the session, have those groups that are either finished with their design, or nearly so, quickly present their design ideas to the group for analysis and discussion. Remind the group that they will begin to use their design for construction of the dryers the following day. Collect all "Materials and Tools Request Forms".
TRAINER'S NOTE
Those groups that have not yet completed their design should continue working during the upcoming construction session.
|
| ||||||||||||||||||||||||||||||||||||||||||||||||||||||||||||||||||||||||||||||||||||||||||||||||||||||||||||||||||||||||
Working with a group: dynamics and facilitation skills
OVERVIEW AND GOALS:
An essential part of community work is to motivate people and enable them to address issues of concern in ways that promote cooperation and self-reliance. For that reason, it is important that the community worker be able to collaborate with groups of people and guide them as they set goals, identify resources, and take steps to attain the goals they have established. In this session, the participants examine - and put into practice - effective facilitation and communication skills. At the same time, they begin to plan and prepare for the end-of-training Fair.
OBJECTIVES:
To develop and practice skills in working with a group
To
examine ways to share information and work cooperatively
To begin to plan and
prepare for the end-of-training Fair
RESOURCES:
Bridging the Gap, pp. 93-94 (The Bamboo Bridge: A Participatory
Planning Tool)
Improved Food Drying and Storage Manual, Session 12
Health
Education Training Model
HANDOUTS:
"The Characteristics of a Good Group Leader/Facilitator"
11A
"Decision Making Process" 115
"Guidelines for a Meeting" 11C
MATERIALS:
Newsprint and markers
PROCEDURES AND ACTIVITIES:
1. (15 minutes) Warm-up Activity and Introduction
Use the following activity, or substitute one of your own: Ask the participants to form pairs. At a signal from you, one person should talk enthusiastically to their partner about something they really like. Meanwhile, the other person should make every effort to act as disinterested as possible, to convey the feeling that what their partner is saying is of no value or interest. Call 'time' at the end of 30 seconds and have the partners switch roles. At the end of the activity, ask the group:
- What did it feel like to be the speaker? The
non-listener?
- How did your partner let you know that what you were saying
was of no interest?
- What are some cultural factors that may enter during
the conversations in this country? In the U.S.? (Do people, for example, make
eye contact? What kind of space is kept between people?)
Point out that during this session, there will be an emphasis on listening carefully to what people say, and to being a good facilitator. Ask what the word "facilitate" means to the group members.
2. (15 minutes) The Characteristics of a Good Facilitator
Distribute and review Handout 11A, and ask if there are other qualities that might be added, or if some of those qualities listed should be modified.
3. (20 minutes) The Role of a Good Facilitator
Explain that the facilitator often helps people find ways of using the resources that exist within the group to help them attain goals and objectives.
TRAINER'S NOTE
Refer to Bridging the Gap, and use the example of the "Bamboc Bridge" as a method of helping people define problems and resources, and take steps needed to accomplish a goal.
Use the following questions to stimulate discussion:
- What should a facilitator do if people have conflicting views
in a group?
- What can a facilitator do to help keep things moving in a
meeting or a group discussion?
- How can sensitive or explosive issues be
handled?
- What can a facilitator do if people don't participate?
- How
can the facilitator keep one person from monopolizing the discussion?
- What
are some ways of keeping a discussion focused on the topic at hand?
- What
are some problems in your community work that relate to facilitation of
groups?
- How does this discussion relate to the topic being examined? What
are the dynamics right now?
4. ( 1 Hour ) The Meeting Format
Present the idea of a meeting as a potentially effective way of sharing information and accomplishing tasks. Refer to Handouts 11B ("The Decision Making Process") and 11C ("Guidelines for a Meeting"), as you:
- Review the meeting format and various roles people will
take
- Ask for a volunteer to facilitate the meeting, which will have as its
goal the initial planning and organization for the end-of training Fair.
TRAINER'S NOTE
Provide the group some guidance in setting an agenda, and in the selection of the recorder, time keeper and observer. (Make sure that people are not "volunteered" by others). Although it will be tempting to give assistance during the meeting, it is important to let the group work through problems on their own as much as possible. Remember to he a participant in the meeting, not a "trainer". It is probable, that due to time considerations, the group will have to hold future meetings outside training hours. Refer to Session 19, "Preparing for the Fair" for more details on the planning and organization of the end-of-training event.
5. (10 minutes) Summary
When the meeting has ended, go over with the group any problems that were encountered and how they dealt with them. Refer to the questions that were discussed in step #3, as well as:
- How were decisions made in this meeting?
- How could this
format be improved?
- Do you think this type of meeting would work in your
community? Why, or why net?
- Do you think that the agenda items were
discussed adequately?
- What are the next steps in preparing for the Fair?
TRAINER'S NOTE
The meeting format may be used for occasional "community meetings" or committee meetings. This will help give the participants practice in facilitation skills, and may be useful in getting work done more efficiently and cooperatively.
THE CHARACTERISTICS OF A GOOD GROUP LEADER/FACILITATOR
A group leader, sometimes also called a facilitator, is someone who clears the way for learning.
A GOOD GROUP LEADER ... is friendly and relaxed treats people as equals, and is honest with them helps make people feel comfortable (sometimes it helps to have everyone, including the group leader, sit in a circle so they can see each other's faces) draws information out of people from their own experiences whenever possible, and helps them see how their own skills, knowledge and experiences relate to the concerns of others uses words that people understand, and speaks clearly asks many questions, and is a good listener encourages people to find their own answers when possible, even when the solution may seem obvious, or it might be easier to supply an answer points out useful information and ideas that have come from the people in the group invents ways to help people test new skills in real situations helps the group when progress is slow, to suggest other ways of moving or getting things done discovers with people and from them what they need to learn respects people, and does not mock them, or make fun of their mistakes or weaknesses recognizes the value in making mistakes and learning from failures and "wrong" answers uses teaching aids that are appropriate to the group (these are usually locally available, low-cost, and are things that people in the group can use or create later)
IS ALSO A LEARNER AS WELL AS A TEACHER!
THE DECISION-MAKING PROCESS
The following types of decision making are familiar to all of us:
1. Plops
A decision suggested by an individual to which there
is no response (e.g., "I suggest we shelve this question.")
2. Self-Authorization
A decision made by an individual who
assumes authority (e.g., "I think we should all write our ideas on the
blackboard." - and proceeds to be the first to do so.)
3. The Handclasp
A decision made by two or more members of
the group who join forces or decide the issue in advance (e.g., "That was a
helpful comment, John. Yes, that's the course we're going to take.")
4. Baiting
A decision made by pressure not to disagree (e.g.,
"No one objects, do they?"), or a decision made by pressure to agree (e.g., "We
all agree, don't we?").
5. Majority Rule
A decision made by some form of voting.
6. Unanimity
A decision made by overt and unanimous consent,
often without discussion.
7. Polling
A decision made by a form of voting which
inquires, "Let's see where everyone stands." - and then proceeds to tabulate the
already expressed majority decision.
8. Consensus
A decision made after allowing all aspects of
the issue, both positive and negative, to be put forth to the degree that
everyone openly agrees it is probably the best decision. This is not necessarily
unanimity, but it constitutes a basic agreement by all group members.
GUIDELINES FOR A MEETING
This method of conducting meetings can help to get a lot work done in a way that is both efficient and cooperative, if a few guidelines are followed:
1. Set up and post an agenda ahead of time so that people attending the meeting can add items they wish to introduce, and can review the agenda before the meeting begins.
2. Don't volunteer other people for tasks during a meeting.
3. Try to make decisions that include all of those attending the meeting, using methods that encourage active participation (refer to the information on "The Decision-Making Process").
4. Beware of "topic jumps". Stay focused on the particular item being discussed. Help the moderator/facilitator keep the meeting moving in positive ways.
5. Pay attention to what is going on. It is maddening to try to accomplish work when there are lots of conversations going on, or people are dozing off. Be a good listener, and avoid monopolizing the discussion.
The following roles should be established before the meeting starts:
1. Moderator/Facilitator: Before the meeting sets up the agenda for all to see. It should contain each item or topic, the person introducing the item, and the approximate amount of time it will take. The facilitator also guides the discussion, and generally helps things move along. (Refer to "The Characteristics of a Good Facilitator")
2. Recorder: Takes notes about decisions made, tasks delegated, responsibilities to be fulfilled. At the end of the meeting review the notes for the group.
3. Timekeeper: Works with the facilitator to keep track of time, and lets the facilitator know when time is about up for an item. This gives the group a chance to decide if they want to spend more time on a particular item or postpone additional discussion to another meeting.
4. Observer Keeps an eye on the dynamics of the group, how decisions are made, the way problems are dealt with, if and how the tasks are accomplished, how the facilitator, timekeeper and recorder fulfill their jobs. Reports observations to the group at the end of the meeting.
An outline for the meeting might look like this:
1. The facilitator sets up the agenda before the meeting
2. At the start of the meeting the facilitator welcomes the group, asks for additions or deletions to the agenda, and requests volunteers for the roles of timekeeper, recorder and observer.
3. The items on the agenda are discussed. Sometimes it is useful to have a category at the end of the agenda called "tidbits" for announcements or other short items that don't require discussions.
4. The recorder reviews for the group decisions made, tasks delegated, etc.
5. The observer reports to the group.
6. The facilitator asks for a volunteer to lead the next meeting, and thanks the people in attendance.
|
| ||||||||||||||||||||||||||||||||||||||||||||||||||||||||||||||||||||||||||||||||||||||||||||||||||||||||||||||||||||||||
How people learn
Overview AND GOALS:
In community education, the methods used in teaching are as important as the information to be shared. The importance is underscored when there are people involved who have had little formal schooling. This session focuses on the factors that help and impede the process of "learning as discovery", as well as ideas for improving teaching and communication skills.
OBJECTIVES:
To identify situations in which learning may occur
To examine
obstacles to learning, and devise ways to overcome them
To identify effective
teaching methods and techniques, and to gain practice in using them
RESOURCES:
Helping Health Workers Learn, Chapters 1, 5-7 and
11-19.
Perspectives on Non-Formal Adult Learning, (Photo Parade), op.
85-88.
Bridging the Gap
Improved Food Storage and Training Manual, Session
8.
HANDOUTS:
Photo Parade Observation Form Handout 12A
"The Experiential
Learning Model" Handout 12B
MATERIALS:
Pens or pencils for each participant
Newsprint and markers,
or chalkboard and chalk
PREPARATION:
Locate 5 or 6 photographs illustrating learning and teaching situations, find examples of: directive teaching, two-way learning, authoritarian teaching, classroom and informal situations. Refer to Helping Health Workers Learn and materials from World Neighbors for some examples. Use local textbooks and other information sources within the country for other examples. Make enough sets of photographs for use during the session.
Ask for volunteers to prepare two role-play situations with the theme of effective and ineffective ways of teaching. (Refer to Helping Health Workers Learn, Chapter 1, pp. 17-23)
PROCEDURES AND ACTIVITIES:
1. (10 minutes) Introduction and Warm-up Activity
Draw nine cats on a chalkboard or sheet of newsprint:
Ask everyone to try to figure cut a way to connect all the dots with four straight lines joined together, without lifting the pencil from the paper. Give a clue: To solve the puzzle, people must go beyond the limits they have set for themselves.
TRAINER'S NOTES
It is possible that no one will come up with the answer. Should that occur, help the participants by giving more clues. Encourage people to help one another, since one of the purposes of the exercise is to start thinking about - and practicing effective learning methods. Perhaps someone in the group will devise a different solution, but this is one way of doing it:
2. (20 minutes) Photo Parade
Have the participants form groups of 5 or 6. Distribute to each group copies of Handout 12A and identical photographs showing learners and teachers in different roles and in a variety of situations. Each person should look at one photo at a time and fill in the appropriate space on the Photo Parade Observation Form. After each photo is studied it should be passed on, so that everyone has a chance to study each photo. When the full parade of photos has passed, the participants should discuss and compare their responses to each photo.
TRAINER'S NOTE
Some or all of this activity may be done in the large group, depending on time considerations, and the size and dynamics of the group.
3. (20 minutes) Discussion
Some questions to include are: In the photos,
- Which situations seemed most comfortable for learning?
-
What obstacles to learning were apparent in the photos?
- In what kinds of
situations do you learn best?
- What are some things you've learned outside
the formal school system?
- How influential is a teacher in either helping
you learn or keeping you from learning?
4. (10 minutes) Experiential Learning
Distribute and discuss the experiential learning model (Handout 12B), and ask for anecdotes that in some way relate to the learning loop. Encourage questions and comments regarding the way that people learn.
5. (20 minutes) Effective and Ineffective Teaching
Have a group of volunteers present two role-play situations to illustrate ways of teaching the same material using effective and ineffective methods.
TRAINER'S NOTE
The role-plays may focus on teaching some aspect of solar food dryer theory or construction. If time permits, you may wish to ask the entire group to participate in the activity. It is useful to have the specific role play situation written on a slip of paper for each group. For example: Show a group of community members how to build a tray for a dryer. In the first roleplay, show an ineffective way of teaching; in the second, a more appropriate approach.
After the role-plays, discuss:
- the methods and ideas that helped learning occur
- the
obstacles to learning in each situation
6. (10 minutes) Ideas for Learning
Introduce the idea of "brainstorming" as an effective way to gather a lot of ideas in a short period of time. Remind people that the technique involves listing as many ideas as possible, without judging whether they should or should not appear on the list.
Ask for suggestions about ideas, methods, tools and techniques that can help people learn in a community setting. Keep a list on newsprint or chalkboard.
The list should include: stories, posters, displays, slides or films, bulletin boards, role-plays, puppet shows, field trips, "hands an" practice, drama and village theater.
7. (15 minutes) Summary
Guide a discussion based on the following questions:
- What are some potential problems in sharing information at the
community level?
- How can community members be involved in their own
education?
- What are some ways to break down barriers to learning?
- What
kinds of learning are traditional in your community?
- What kinds of learning
situations seem to work well in your community?
- Which of the ideas listed
may be appropriate for use in your community?
Point out that people will have the opportunity during the course to practice and develop teaching tools and methods that will be useful in community work.
PHOTO OBSERVATION FORM
|
Photo: |
1 |
2 |
3 |
4 |
5 |
1. WHO IS THE EXPERT IN THIS PHOTO?
a. the one who seems to be a community worker or teacher
b.
participant
c. both
d. can't tell
2. WHAT ROLES ARE THE PARTICIPANTS PLAYING?
a. active
b. passive
c. can't tell
3. HOW MANY OF THE PARTICIPANTS SEEM INTERESTED?
a. few
b. many
c. all
4. HOW WOULD YOU CLASSIFY THE COMMUNICATION THAT IS TAKING PLACE IN THE PHOTO?
a. from community worker/teacher to learners
b. from learners
to health worker
c. mutual
5. HOW WOULD YOU DESCRIBE THE HUMAN RELATIONS HERE?
a. authoritarian or dependent
b. mutual respect
c. can't
tell
6. IS THE "TEACHER' S" ROLE IN THIS TYPE OF LEARNING SITUATION EASY OR HARD?
a. easy
b. hard
7. DO YOU THINK THE APPROACH SHOWN HERE IS APPROPRIATE TO VILLAGERS?
a. in most situations
b. in some situations
c. never
THE EXPERIENTIAL LEARNING MODEL hen we learn something - a task, a skill, knowledge of some sort, or even how to avoid something, like a hot stove - we go through stages of absorbing the new information, and finally using it in a way that has meaning to us. The learning loop, as it is called, may be visualised like this:

Experience
An illustration: A child approaches a hot stove and tentatively puts a hand out to feel what is there. As his hand touches hot metal, he withdraws it and cries out in pain. He thinks, on some level, "stoves are hot, they burn and cause pain." Next time (or however many times it takes to make the connection), he is cautious about touching stoves and may not even want to go near one, hot or cold, for a long time. First, there was the experience of burning and pain; then, of reflecting and sharing feelings (calling out to mother); then of generalizing stoves are hot, and applying that knowledge to the next experience. It may be that the child will find out that all stoves are, in fact, not hot, and that he will have to be cautious only when he knows (through observation, experience, and second-hand information) that the stove is lit.
Experience becomes a art of learned knowledge and goes on to provide information for new experiences.

Experience
We all learn best when we take an active part in finding out things that are new to us!
· A class in which we take part in discussions is more interesting than a class in which we just listen to a lecture.
· A class in which we can see for ourselves what things look like and how they work, is more interesting than a class in which we only talk about things.
· A class in which we not only talk and see, but actually do and make and discover things for ourselves, is exciting! When we learn by finding things out for ourselves, by building on experience we already have, we do not forget. What we learn through active discovery becomes a part of us.

Experience

From Helping Health Workers
Learn
|
| ||||||||||||||||||||||||||||||||||||||||||||||||||||||||||||||||||||||||||||||||||||||||||||||||||||||||||||||||||||||||
Solar food dryers: construction
OVERVIEW AND GOALS:
Throughout the program, participants will work in construction groups to design and complete a Solar Food Dryer to use both during the program and when they return to their communities. In this way, they will not only develop technical expertise, but will also gain practice in working with people of varying skill levels in solving problems cooperatively.
OBJECTIVES:
To practice using simple hand tools
To develop basic
construction skills
To construct a Solar Food Dryer appropriate for a given situation
RESOURCES:
Improved Food Drying and Storage Manual, Session 11
HANDOUTS:
"Evaluation Checklist for Solar Food Dryer Design", Handout
6A
"Material and Tool Request Forms", (see Session 10)
MATERIALS:
Tools and materials requested by construction groups
PREPARATION:
As the tools and materials needed will not be known until the designs have been completed in Session 10, it is recommended that a thorough preliminary investigation be done as to where to buy simple hand tools and commonly used construction materials. It is very helpful to anticipate the group's needs and buy as much as possible ahead of time.
Make sure there is adequate work area for each group to construct their dryer, as well as a safe place to store tools and materials when not in use.
PROCEDURES AND ACTIVITIES:
1. (15-20 minutes) Introduction
Discuss the importance of attention to quality of work in construction of the dryers, as well as the efficient use of time. Point out the fact that a second project (either another dryer or a Fireless Cooker) may be started upon completion of the first one.
Identify people in the group with carpentry skills who can serve as resource people during the construction sessions.
TRAINER'S NOTE
Instruction on tool use and basic carpentry skills may be offered later to those who want it, while the others begin work on their dryers.
Distribute one large cardboard box to each group for storing their tools and materials.
Point out that extra amounts of commonly needed items (such as nails and putty) will be kept on hand. However, each group is responsible for turning in a detailed request form a day ahead of time for all other items needed.
Suggest that they keep a careful record of the cost of materials during the construction process.
2. (15-20 minutes) Distribution of Supplies
With the help of the Site/Tools and Materials Committee, make sure each group receives what was ordered on their request form.
3. (minimum of 20 hours throughout the program) Construction
Circulate among the groups and offer guidance and constructive criticism whenever appropriate. Facilitate the learning process, including allowing people to make (and learn from) their own mistakes.
4. (15 minutes) Summary
Near the end of each work session, remind groups of the time so they can clean up their work area and store tools and materials.
Facilitate a brief check-in at either the end or beginning of each construction session to share work progress, problems, solutions, etc.
|
| ||||||||||||||||||||||||||||||||||||||||||||||||||||||||||||||||||||||||||||||||||||||||||||||||||||||||||||||||||||||||
Storage of dried foods
OVERVIEW AND GOALS:
The use of correct storage procedures and methods is essential to prevent contamination or spoilage of preserved foods. In this session, participants learn appropriate ways of storing dried foods.
OBJECTIVES:
To identify the conditions required for proper food
storage
To examine ways of attaining proper storage conditions
To learn
steps to take in the storage of dried foods
RESOURCES:
Improved Food Drying and Storage Manual, Session 5
Small Farm
Grain Storage
Putting Food By, Chapter 21
HANDOUTS:
"Storage of Dried Foods", Handout 14A
MATERIALS:
Newsprint and markers
Samples of dried foods that have
spoiled
Several samples of containers not suitable for storage of dried
foods
A variety of good storage containers
PREPARATION:
Prepare a fill-in-the-blank version on newsprint of Handout 14A, "Storage of Dried Foods." Leave blanks whenever appropriate so that participants can fill in their own answers.
PROCEDURES AND ACTIVITIES:
1. (10 minutes) Introduction
Distribute the samples of spoiled food. Ask what could have caused the spoilage and how it could have been prevented.
2. (45 minutes) Problems with Dried Food Storage
Form small groups according to region. Have each group discuss: methods for food storage in their community - problems with food storage - suggestions for dealing with the problems
Ask each group to take approximately ten minutes and devise an interesting and informative way of presenting the information regarding their region to the group.
Distribute newsprint and markers if needed. Have each group present their findings, and encourage comments and questions from the participants.
TRAINER'S NOTE
Some suggestions for presentations include using role plays, charts, pictures, or dramas. Refer to the list of ideas for teaching and sharing information developed by the participants in Session 12, "How People Learn".
3. (20 minutes) Optimal Storage Conditions
On the basis of the previous discussion, guide the participants in determining the optimal conditions for food storage (clean, cool, dark, dry). Ask why each of the conditions is important. Ask for suggestions about ways to attain each condition. (i.e. use airtight containers, store underneath the house.)
4. (35 minutes) Steps in Proper Food Storage
Review the information (prepared on newsprint) about food storage. Demonstrate the points discussed whenever possible.
Discuss storage containers as you display the examples to the group. (Refer to Preparation.) Ask participants to decide which containers are appropriate for storage of dried foods, and why. Ask people to suggest additional examples of appropriate storage devices for their own region.
5. (10 minutes) Summary
Explain that each construction group will be responsible for storing food from their dryers as needed throughout the rest of the course. Encourage them to experiment with different containers and methods.
STORAGE OF DRIED FOODS
The following are guidelines to be used in the proper long-term storage of dried foods:
NOTE: For more information on steps 1-4, refer to Session 8, "The Use of Dried Foods."
1. Test for dryness.
2. Pasteurize (optional).
3. Cool before storing.
4. Condition (optional).
5. Clean storage containers well.
6. Try to anticipate the eventual use of dried foods and store them in corresponding quantities in either paper or food-grade plastic bags (i.e., the approximate amount of a mixture of vegetable to go into a soup) before storing in a larger moisture-proof container. This not only makes using the foods convenient, but will also help to prevent exposing a large batch of dried food to moist air when taking out a small quantity for immediate use.
7. Don't combine strong smelling foods in the same container.
8. Store herbs with their leaves intact. This will minimize loss of flavor and aroma which occurs when more surface area is exposed to the air.
9. Make sure only food-grade materials come in direct contact with the food. (Garbage bags and most colored plastic bags should be avoided. When in doubt, don't use it!)
10. Identify all containers. Include the date and contents.
11. Rotate your stock of dried foods. When adding a new batch, use up the oldest foods first.
12. Roll leathers in plastic before storing in an airtight container.
13. At the first sign of moisture inside the storage container, remove any pieces that appear spoiled and return the rest to the dryer.
14. Don't store foods for more than a year, if possible, as the flavor, aroma and nutritional value slowly deteriorate during storage.
15. Make sure your storage containers are moisture proof (this will also ensure that they keep out insects, rodents and dirt).
16. To test whether a container is moisture proof:
Fill with water and put the lid on. Shake the container or turn upside down and watch to see whether any moisture escapes. If not, it passes the test!
17. To moisture-proof containers that leak around the lid, dip a strip of cloth in melted wax and quickly wrap it around the space between the container and its lid.
18. Some suggestions for suitable storage containers include: glass jars, "tin" cans, gourds and ceramic containers with external glazing. Plastic or paper bags are not moisture proof and, therefore, should only be used for separating small quantities of food inside a large container.
19. Store in the coolest place available, (i.e. under the house, in a storage shed that is protected from the sun and has good ventilation, near or on the kitchen floor and as far from the heat of the stove as possible.) Ideally, storage temperatures should not exceed 15ºC.

STORAGE
|
| ||||||||||||||||||||||||||||||||||||||||||||||||||||||||||||||||||||||||||||||||||||||||||||||||||||||||||||||||||||||||
Teaching and communication skills - Preparing demonstrations and learning activities
OVERVIEW AND GOALS
One of the purposes of technical training programs is to provide a forum for ideas and innovative teaching tools that can be adapted for use at the community level. In this and following sessions, the participants build upon skills and experience gained during the program, and begin to develop effective materials and methods that can be used to share technical information with community members.
OBJECTIVES:
To create and practice using locally appropriate learning materials and methods relating to solar dryers and food storage methods
To develop and use criteria for evaluating the effectiveness of teaching tools and methods
RESOURCES:
Helping Health Workers Learn: Chapters 11-16, 17.
Health
Education Training Model, Sessions 4, 9, 10 and 11.
Improved Food Drying and
Storage Training Manual, Sessions 18, 20-22,
The Photonovel, A Tool For
Development
Bridging the Gap
Audio-visual Communications Teaching Aids
Resource Packet
HANDOUTS:
"Guidelines for Appropriate Teaching Aids", Handout 15A
MATERIALS:
Newsprint and markers, or chalkboard and chalk, as determined by by the participants
PREPARATION:
Before the program begins, ask participants to bring examples of
teaching tools or ideas that they have used in their work.
Gather a variety
of examples of teaching aids.
PROCEDURES AND ACTIVITIES:
1. (10 minutes) Warm-up Activity
Have volunteers demonstrate the teaching tools or ideas that they have brought to the program.
2. (15 minutes) Sharing Ideas about Teaching Tools and Methods
Refer to the list of potentially useful methods, foals and techniques developed in Session 12, "How People Learn". Ask for additions to the list. Encourage the group to examine a wide variety of ideas: story-telling (role play, drama, puppetery); visual aids (flannelboards and flexiflans, slide presentations, posters, drawings, flip cards, comic books and photonovels); discussions and demonstrations.
Show some examples of teaching materials. With the group, analyze each one regarding its potential for being an effective and appropriate tool or method in community education.
Ask for ideas about how each one may be adapted to the theme of the training program.
TRAINER'S NOTE
During or after this session is a good time to schedule workshops in puppetry, drama, radio or other methods of communicating information. If there are local resource people available, encourage them to participate in the training course.
If some of the participants have particular skills in developing teaching aids, give them the opportunity to teach optional workshops, making sure that they still have adequate time to complete their own projects.
Refer to Helping Health Workers Learn for detailed descriptions of teaching aids and methods.
Use the Audio-Visual/Communications Teaching Aids Resource Packet and the Improved Food Storage Training Manual for ideas and reference material.
3. (20 minutes) Developing Criteria for Evaluating Teaching Tools and Methods
Use the following questions to guide a discussion of ways to determine the effectiveness of teaching methods and aids. Keep a list of criteria on newsprint.
- What are some ways of determining the value of a teaching tool
or method?
- How can you tell if a method or teaching aid is accomplishing
its goal?
- How can you stimulate audience participation?
- How can you
tell if a method or tool is appropriate for its intended audience?
- What are
some specific characteristics of a successful teaching tool or method?
Distribute "Guidelines for Appropriate Teaching Aids" Handout 15A, and ask the participants to add to the guidelines, based on the discussion and criteria list just developed. Point out that the guidelines should be followed during the development of materials and methods demonstrations.
4. (time as needed throughout the training program) Developing Presentations
Have the participants begin to work on presenting technical information about solar dryers, as well as other energy conserving food technologies, using the guidelines and the criteria list for appropriate teaching methods and tools.
TRAINER'S NOTES
Schedule the presentations throughout the rest of the program. Some of these may be given during the technical review scheduled for the ninth day of training. This would involve going into more depth in areas mentioned during the mid-program evaluation as needing additional study or review. If the participants have expressed interest in learning about other food preservation technologies (e.g. smoking, canning, brining, salting) they may choose to present information about one of those topics. All participants should be preparing presentations for the end-of-training Fair.
5. (time as needed) Presentations
After each presentation, have the participants refer to the criteria list developed and evaluate the content, format and participation of each group. Some questions to guide the evaluation:
- Was the information technically accurate, clear and
appropriate for the intended audience?
- Was the group making any assumptions
about people's values regarding technology? health? If so, did they seem
accurate?
- Were there any secondary or hidden messages in the
presentation?
- Were you convinced by the message? Why, or why not?
- Do
you think that people with little formal education would learn from the
presentation?
- Was tradition incorporated in the method of presenting
information, or in the technology used?
- Was the audience involved?
- Was
discovery a part of the presentation?
GUIDELINES FOR APPROPRIATE TEACHING AIDS
Whenever possible:
1. Make your own teaching aids, using low-cost local
materials,
2. When making teaching aids, use and build on skills students
already have.
3. Try not to make the aids for the students, but rather
involve students or members or the community in making them for
themselves.
4. Look for ways to use real objects instead of just drawing
things.
5. Draw human anatomy (and signs of health problems) on people, not
on paper,
6. Teach new ideas or skills by comparing them with familiar
objects or activities.
7. Make teaching aids as natural and lifelike as you
can, especially when detail is important.
8. Use teaching aids that call for
doing as well as seeing - aids that students must handle or put together.
9.
Make them as fascinating or fun as possible, especially teaching aids for
children.
10. Use teaching aids that do not simply show or explain something,
but that help the students to think things through and discover solutions for
themselves - teaching aids that exercise the learners' powers of observation and
reason.
11. Use your imagination, and encourage students to use theirs. Turn
the making and inventing of teaching aids into a challenge and an
adventure.
12. Keep teaching aids relatively simple, so that when health
workers return to their communities, they can make their own and teach others.
In summary: Create and use teaching aids that help develop self-reliance in both acting and thinking - in helping persons find things out for themselves.
|
| ||||||||||||||||||||||||||||||||||||||||||||||||||||||||||||||||||||||||||||||||||||||||||||||||||||||||||||||||||||||||
Introducing a new technology is it appropriate?
OVERVIEW AND GOALS:
It is essential that people involved in the process of community development think about the eventual effects and results of any new technology or method they will introduce. In this session, the participants have the opportunity to examine the benefits and drawbacks of being part of technological change, and to make decisions as to their role in promoting community health and self-reliance.
OBJECTIVES:
To examine the role of the community worker in the introduction
of a new technology
To identify characteristics of an "appropriate"
technology
RESOURCES:
Helping Health Workers Learn, Chapter 15
Appropriate
Technology Sourcebook, Introduction
HANDOUTS:
"A Case for (or Against) Canning?", Handout 16A
"Appropriate
and Inappropriate Technology, Handout 16a
MATERIALS:
Pens and paper
PREPARATION:
(Optional) Develop a case study or other teaching aid concerning the introduction of a new technology.
PROCEDURES AND ACTIVITIES:
1. (45 minutes) Introduction
Distribute Handout 16A, and allow time for the participants to read it.
TRAINER'S NOTE
This activity may be done either in the large group or in smaller discussion groups. If you choose, use another case study.
Discuss the questions at the end of the case study. Encourage the participants to relate the study to their own experiences.
2. (15 minutes) Criteria for Appropriate Technologies
Distribute and review Handout 16B. Ask if there are any additions or changes that the participants would make to the list of characteristics of an appropriate technology. Include the following questions to guide the discussion:
- In the case study, was canning an appropriate technology? Why,
or why not?
- Does solar drying fit the criteria for an appropriate
technology in your community?
- Does a fireless cooker? Any of the other
technologies or methods we've covered in this training course?
3. (15 minutes) Summary
Ask the participants:
- What is your role in the introduction of a new technology in
your community?
- How (and by whom) is that role defined?
- How do you
think you will apply what you have learned in this course?
TRAINER'S NOTE
This session can be linked to the formulation of Action Plans (Session 21, Conclusion to Training). In that session, the participants look at their role as community workers, and make specific plans and recommendations for using what, they have learned in this training course.
A CASE FOR (OR AGAINST) CANNING?
Anita was nearly in tears. How could her Peace Corps experience be turning into this soap opera, when just a few days ago she'd been so happy to be in Belize that she had begun writing a letter asking to extend for a third year.
What had happened? Wasn't this in-service just what she'd wanted? A chance to get together with other village and Ministry extension workers, learn some new technologies for dealing with food preservation and storage, and trade ideas and information? Why did she feel so horrible, so alone, so alienated from everyone, both national and American?
OK, Anita thought, let's run this one through logically, and try to understand the "why" and the "how" of the last two days. She got out her journal and began to write:
I am a college graduate, I majored in home ec., and learned a lot about food technologies from people who knew what they were talking about. I've been canning since I was a kid, and I know from practice and theory that you can get really sick if the canning is done incorrectly. I know that people in this country are poor, and that in the villages there is scarcely enough money to buy the necessities of life, let alone pressure cookers and high-tech canning equipment. It's absurd to teach canning as a method of food preservation here, especially when there are other, probably better ways to do it. I can't believe that the Ministry home extensionists in this course really want to take canning to the villages... Oh, yes, the Mennonites who've lived here for nearly forever do can. And they are coming to do a short workshop for us, and I've heard they've taught villagers how to do it. But, the Mennonites use experience and knowledge about the technology and they are very careful.
But almost everyone here wants to learn how to can. They came to the course expecting that it would be taught. And they don't want to go away disappointed. It is what all the villagers want, they say, and its going to be taught no matter what I say, no matter what the instructors tell the extensionists, no matter how dangerous it might be under village conditions.
Today we were to give talks on different ways of preserving food, and my partner was Mary, the Director of the Home Extension Office at the Ministry. At first, Mary wanted to talk about canning as a great method for village extension workers. I finally convinced her to give a short talk about how dangerous it was to can, and then I showed the proper way to do it - with mason jars, and lids and a pressure cooker. She was uncomfortable with saying "no" to the canning idea, in front of all those other extension workers, especially since she'd been teaching it for years. Out I convinced her that it was the only right thing to do, so she did it. Now that I look back, she kind of stood there stiffly and recited the words. I wonder if she really was convinced? I wonder what she was thinking? I know that Mary said that she'd never seen anyone get sick, but I don't know how much she's really practiced canning...
It was right after the talks that I noticed the national extensionists giving me the cold shoulder. I guess they were mad at me for saying that canning wasn't safe, and maybe for convincing Mary to take the same stance. But I know I'm right, and I know they will thank me later.
I'm just doing what I think is best. After all, what happens if someone gets sick, or dies, even, as a result of improper canning? And the canning technology was taught in one of our Peace Corps Workshops?... What if? What if? I don't know what I did wrong. All I know is that I feel terrible, and I don't know how to face the group again tomorrow.
I guess I'll just go to sleep and hope I feel better in the morning.
Where did Anita go wrong?
What would you do to solve the dilemma?
Whose responsibility is it to either teach or not teach a method that might be dangerous and inappropriate?
What would be a helpful and useful approach to working with a village to preserve food?
HANDOUT 16B
Appropriate and
Inappropriate Technology
'HARD' AND 'SOFT' TECHNOLOGIES
Appropriate technology is a fashionable way to say "doing things in low-cost, effective ways that local people can manage and control."
Development workers often use the term appropriate technology to refer to practical, simple THINGS - such as tools, instruments, or machines - that people can make, use, and repair themselves using local resources.
But appropriate technology also refers to METHODS - ways of doing, learning, and problem solving that are adapted to people's needs, customs, and abilities.
The technology of THINGS is called 'hard'; technology of METHODS is called 'soft'. Ideas are more flexible than bricks (if both are appropriate).

Two kinds of appropriate technology
HOW APPROPRIATE IS A SPECIFIC TECHNOLOGY?
To determine whether a certain thing or method is appropriate for your area, you can ask yourself the following questions:
Is it acceptable to the local people?
Do they (or will they) use it effectively?
Will it help to improve the wellbeing of those in greatest need?
is it low-cost and efficient?
Does it make full use of local resources, traditions, and abilities?
Does it take into consideration any local factors such as geography, climate, and traditions, that may affect its usefulness?
Does it keep a natural balance with the environment?
Is it something that local people can easily understand, afford, and repair by themselves?
To what extent were local people involved or consulted in its planning, design, selection, or adaptation?
Does it provide more local employment? Or does it take jobs away?
Does it build people's confidence to find their own answers and make their own decisions?
Will it help close the gap between the rich and the poor? Or widen it?
Does it help the weak to gain greater control and become more self-reliant?
From Helping Health Workers Learn
MID-PROGRAM EVALUATION
TRAINER'S NOTE
Select activities from Appendix G. Ideas for Evaluation. It is recommended that the mid-course evaluation include a question concerning specific technical information the participants would like to have reviewed during the "technical review" to be presented by the trainer during the second week. See Calendar, Appendix A. Some of the technical information requested may be included in the participants' method demonstrations, which should be presented before the technical review.
|
| ||||||||||||||||||||||||||||||||||||||||||||||||||||||||||||||||||||||||||||||||||||||||||||||||||||||||||||||||||||||||
Fireless cookers
OVERVIEW AND GOALS:
Through the use of two well sealed and insulated containers (termed a Fireless Cooker), it is possible to cook for long periods of time using only retained heat. This session serves as an introduction to this easily built and low-cost fuel conserving device.
OBJECTIVES:
To analyze the advantages and disadvantages of a Fireless
Cooker.
To learn to design, construct and use a Fireless Cooker.
RESOURCES:
Fireless Cookers
HANDOUTS:
"Fireless Cookers: Design and Use", Handout 17A
MATERIALS:
Large cooking pot with lid
Samples of low-cost, locally
available insulation materials
Several examples of poor insulation
materials.
Fireless cooker model
PREPARATION:
Using local materials, make at least one low-cost Fireless Cooker to use as a demonstration model.
Prepare a simulated cooking area (i.e., an open 3-rock fire or an overturned box with crumpled red cloth or paper on top) to be used in Step 1.
PROCEDURES AND ACTIVITIES:
1. (15 minutes) Introduction: A Look at Traditional Cooking Fuels
Guide a discussion on traditional cooking fuels used in the participants' communities, as well as the problems associated with each (cost, scarcity, health problems, etc.).
Record the information on newsprint,
Ask if, based on this information, there seems to be a need for conserving cooking fuel in the participants' communities.
2. (30 minutes) Decreasing Heat Loss
Using the cooking pot and simulated cooking area, discuss the many paths that heat from the fuel source actually takes.
During the discussion, elicit definitions of the three terms relating to heat transfer or lass: conduction, convection and radiation. Ask the group for ideas on how to significantly reduce the three types of heat loss occuring from the cooking pot, to allow more efficient use of the cooking fuel.
Guide them in concluding the following relationships:
Type of
Heat Loss Prevented by:
Conduction Insulation
Convection Sealing openings
well
Radiation Reflective lining
Display the Fireless Cooker model. Have
the group analyze how effective it would be in significantly decreasing the
three types of heat loss. Ask for suggestions to improve the design.
3. (15 minutes) A Look at Insulation Materials
Display the examples of good and poor insulation
materials.
Have the group decide in which category each material belongs, and
why.
Guide them in determining what makes a material effective as an
insulator.
Ask for examples of low-cost, locally available materials people
think could be used in a Fireless Cooker. Record these on newsprint.
4. (10 minutes) Definition and History of the Fireless Cooker
Elicit a definition of the Fireless Cooker from the group, to ensure that the idea of what it is and how it works is clear. Write the definition on newsprint.
Briefly review the history of Fireless Cookers, emphasizing the fact that it is an ancient method of conserving energy that is still widely used today.
5. (20 minutes) Appropriateness of the Fireless Cooker
Facilitate a discussion to compare the advantages and disadvantages of Fireless Cookers. Record both in separate columns on a sheet of newsprint.
On the basis of this discussion, ask the participants whether they feel the Fireless Cooker is an appropriate technology for their own community. Why, or why not? What reactions do people anticipate from community members regarding the technology?
Ask for suggestions of some effective ways of introducing the new technology.
6. (20 minutes) Design and Use of Fireless Cookers
Distribute and review Handout 17A, "Fireless Cookers: Design and Use". Ensure through ongoing questioning that everyone understands the reasons for the principles of Fireless Cooker design and use.
7. (10 minutes) Summary
Answer any remaining questions about the information discussed.
Inform people that they will have the option of designing and constructing a Fireless Cooker as their second project.
TRAINER'S NOTE
The participants should submit a design and materials list for approval when their Solar Food Dryer is completed. Remind people that their Fireless Cooker should be easy to build so that there will be ample time to experiment with them during the course.
Fireless cookers
DESIGN AND CONSTRUCTION OF A FIRELESS COOKER:
1. Gather your most commonly used cooking pots (with short handles only)
NOTE: The pots must have tight fitting lids and flat bottoms. A cooking pot made from any material will work well, although pots made from thick heat-retaining materials such as ceramic or iron will work the best.
2. Measure the diameter of the pot (include handles in the measurement).
3. Select a slightly larger, sturdy container.
4. Line the container with foil or other sturdy reflective material (optional).
5. Select an outer container (example: wooden keg, drawer, basket, cloth bag or a hole in dry ground) to go around the inner container. It should be large enough to allow a space of at least four inches between the walls and bottom of both containers where one is placed inside the other.
6. Devise some way (using wooden blocks, "tin" cans, rocks, etc.) to support the inner container when a pot of food is placed inside it (Compressing the insulation will decrease its effectiveness).
7. Select a low-cost insulation material (suggestions: crumpled newspaper, dry grass, wood shavings, feathers, wool, rags).
3. Devise a way of surrounding the inner container with insulation.
9. Moisture-proof the insulation by enclosing it in plastic. (Insulation loses its effectiveness when wet). This may be done with a series of "pillows"; one for the top, one for the bottom, and either one long or several smaller ones for the sides. Se sure the pillows are large enough so that no heat leaks will occur where two of the pillows meet.
10. Devise a top for the Fireless Cooker to cover the insulation material if desired (for aesthetic purposes). If you are using a wooden box for the outer container, insulation may be included in the lid instead of being in a separate pillow.
USING A FIRELESS COOKER:
1. A Fireless Cooker may be used to cook any foods that are normally cooked in a liquid.
2. Use slightly less water (approximately 9/10 the normal amount), as little is lost through evaporation.
3. Bring the covered pot of food to a boil, then simmer for the following amounts of time:
SOUPS, STEWS, BEANS: 10-15 minutes
MEAT, FISH: 10-30
minutes
CEREAL AND GRAINS: 1-5 minutes
The exact time needed will depend on the size of pieces of food being cooked (e.g., chunks vs. shreds of meat). Use the above mentioned foods to approximate others not included in the list.
4. Put the pot of food in the Fireless Cooker, and place the insulated cover over the top. The Fireless Cooker should be placed as close to the cooking area as possible to minimize heat loss when transferring the pot.
5. Cooking time should be slightly increased to compensate for the steadily decreasing temperature inside the pot. Experiment in the beginning to understand how efficiently your Fireless Cooker will perform.
6. Avoid opening the Fireless Cooker as much as possible during the cooking process to avoid unnecessary heat loss.
7. A well built Fireless Cooker should maintain enough treat to cook food for at least eight hours. If yours is not performing well, check for heat leaks or areas with insufficient insulation.
8. Fireless Cookers may also be used to incubate yoghurt or as a cool or cold storage box.

FIRELESS
COOKER
|
| ||||||||||||||||||||||||||||||||||||||||||||||||||||||||||||||||||||||||||||||||||||||||||||||||||||||||||||||||||||||||
The use of dried foods
OVERVIEW AND GOALS:
Dried foods retain a surprising amount of their original flavor and aroma. Both are, in fact, often enhanced because of the concentrated nature of dehydrated food. Used either in the dried state or after rehydration, these foods can provide a delicious and nutritional addition to one's diet. In this session, participants learn specific ways using dried foods.
OBJECTIVES:
To examine the various uses of dehydrated foods
To learn how
to rehydrate as well as cook with dried foods
RESOURCES:
Preserving Food by Drying
Putting Food By, Chapter 21
HANDOUTS:
"Rehydration and Cooking of Dried Food", Handout 18A
MATERIALS:
Variety of dried foods
Water (for rehydrating)
Several
shallow bowls
PROCEDURES AND ACTIVITIES:
1. (10 minutes) Introduction
Ask particpants what dehydrated foods they have either eaten in the dried state or used in cooking. What was their opinion of the taste? The color, texture and aroma? Other reactions or comments?
2. (35 minutes) Uses of Dried Foods
Distribute "Rehydration and Cooking of Dried Foods", Handout 18A. Review the suggestions for use in cooking. Have participants suggest examples of local dishes that could be made using dehydrated foods.
Review different methods of rehydrating. Demonstrate as each method is discussed.
Pass around several dishes of rehydrating foods, including a mixture of vegetables with a strong aroma so people can observe the retention of aroma as well as the proper amount of water to use in proportion to the food.
3. (15 minutes) Summary
Discuss any further questions participants may have regarding the use of dried foods. Explain that part of the construction period from now on should be used as a time to experiment with the cooking of dried foods.
TRAINER'S NOTE
It may be helpful to post a sign-up list, with time slots available for cooking, to avoid overcrowding of the facilities. Remember to give a kitchen tour before groups start to use the area. For the practice in using dried foods the participants should submit a list of ingredients needed the day before they plan to cook. Encourage people to use local recipes, as well as to use their Fireless Cookers during the preparation of food.
REHYDRATING AND COOKING DRIED FOODS
In general, most dried foods can be successfully rehydrated, by allowing them to soak up the original amount of moisture lost, and then cooking them as you normally would. Many foods can be simply rehydrated and eaten without being cooked. The majority of dried foods are delicious just as they are; it is really a matter of individual taste.
Experiment by using dried foods in a variety of ways to decide what your own preferences are. The following are some suggestions for cooking with dried foods in the form of powder, leather, slices or strips.
Powdered Foods
Vegetables: broth, sauces, baby food Fruits: drinks, puddings, dessert flavoring, baby food Herbs: any recipe where fresh herbs are used
Leather
Vegetables: soup, sauces, stews Fruits: drinks, pies
Slices or Strips
All foods dried in this form can be rehydrated and then used in cooking as if they were fresh.
How to Rehydrate
All foods to be used in cooking (except for leafy greens, herbs, and foods in powdered form) should be rehydrated first to avoid a tough or rubbery texture.
NOTE: Dried foods rehydrate to approximately 90% of their original size.
Use one of the following two methods for rehydrating foods, whether they will then be cooked or not. The slow method should be used if time allows as it results in a better texture.
Slow Method
Place dried food in a bowl and barely cover with cold water. Soak for 2-6 hours until the required texture is attained.. (Refrigerate if soaking for more than 2 hours).
Quick Method
Place dried food in a sauce pan and barely cover with cold water. Bring to a boil, and then simmer until the food is nearly restored to its original texture.
Nate: Foods soaked for too long or in too much water become soggy and waterlogged. It is better to start with too little water and add more later as it becomes necessary during the rehydration process.
|
| ||||||||||||||||||||||||||||||||||||||||||||||||||||||||||||||||||||||||||||||||||||||||||||||||||||||||||||||||||||||||
Preparing for the fair
Overview AND GOALS:
At the conclusion of the training program, the participants have the opportunity to present to the public the solar and energy conserving food technologies that they have designed and built. During the Fair, a variety of methods of sharing information are put into practice, integrating the technical and community education aspects of the training.
OBJECTIVES:
To plan and carry out an event to introduce the public to energy
conserving food technologies
To use a variety of effective teaching and
communication methods
RESOURCES:
As determined by the participants, for example: local press and radio, schools (for publicity) Ministries, agencies working in community development (for support and assistance).
MATERIALS:
As needed, and determined by the training budget
PREPARATION:
Well ahead of the planned date, the participants should meet (See session 11) and organize the preparation activities. During the training, committees should meet and accomplish tasks.
TRAINER'S NOTES
Encourage the participants to use their creativity in preparing for the Fair. Provide some time during training for meetings, if possible. Give guidance and support, but try to stay on the sidelines so that the Fair is directed by the participants.
PROCEDURES AND ACTIVITIES:
1. (Time as needed, at least one hour) Preliminary Planning
Meeting
(Refer to Session 11) The group should meet to decide on
- format for the fair
- time line for accomplishing the
tasks
- committees to share responsibilities
The committees may include: publicity - coordination site (set-up and clean-up) food - program
2. Preparation Time
The participants determine the planning procedures, and divide responsibilities among the group members.
3. Rehearsal
Each individual or group should present their contribution to the Fair.
TRAINER'S NOTE
This step may be combined with Session 15: "Teaching and Communication Skills: Preparing Demonstrations and Learning Activities".
4. The Fair
Each event, activity, demonstration or exhibit should:
- fit
the criteria for an "appropriate technology"
- help people think or discover
new ways of looking at a problem
- in someway, be entertaining or
stimulating
- present information clearly and accurately
TRAINER'S NOTE
The Fair should be held wherever there is sufficient room for a community gathering, preferably outdoors. If rain is likely, have an alternate site in mind. If possible, involve members of the local community in the preparation for the Fair.
|
| ||||||||||||||||||||||||||||||||||||||||||||||||||||||||||||||||||||||||||||||||||||||||||||||||||||||||||||||||||||||||
Conclusion to training
OVERVIEW AND GOALS:
The purpose of this last session is to bring the program to a close and create a transition back to community work. In addition to evaluating the program, the participants also develop an action plan that will serve as a framework for using what they have learned during the course.
OBJECTIVES:
To review and evaluate the content and format of the training
program, as well as the participation of all involved
To develop a plan of
action for future community work
RESOURCES:
Improved Food Drying and Storage Manual, Sessions 25 and
30
Appendix G: "Ideas for Evaluation"
HANDOUTS:
"Guidelines for an Action Plan", Handout 20A
MATERIALS:
Newsprint and markers
Pens and paper
PROCEDURES AND ACTIVITIES
1. (10 minutes) Introduction
Post a list of activities that need to be completed. Ask for other suggestions from the group. The list should include: clean up and organization of the site; evaluation; action plans; preparation for fair; finish construction projects; practice demonstrations; closing ceremony; fair; and party.
2. (1 hour) Evaluation
Select one or more of the suggestions from Appendix G. "Ideas for Evaluation." Discuss the results of the evaluation, focusing on:
- ways in which the course can be applied to future work
-
how the course can be improved
3. (time as needed and available) Action Plans
Distribute and review Handout 21A, and ask if there are additions or modifications that should be made.
TRAINER'S NOTE
If time is short, have the participants complete the action plans an their own time. When the plans have been completed, you may wish to post some of them, or have a group discussion. Arrange to have the action plans mailed back to the participants after 2 or 3 months.
4. (time as needed) Final Details
Refer to the list of tasks to be completed. Have each committee take responsibility for some aspect of ending the course.
TRAINER'S NOTE
Make sure that as many tools and materials as possible are stored and returned before the fair. It is easier, and less likely that things will be lost, if the majority of cleanup and storage is done ahead of time.
5. (time as needed) Closing Ceremony
TRAINER'S NOTE
It is up to you and the participants to plan and carry out the mast appropriate closure to training. Whether during the fair or at a separate event, it should include the distribution of certificates of completion. You may also want to have a party with the end of training as its theme.
GUIDELINES FOR AN ACTION PLAN
Please answer the following questions as you plan the next six months of your community work. We will send you a copy of your plan in a couple of months so you can see how well it matches with reality.
May we share this plan with others in the training course?
1. How will you use what you've learned in the course?
2. How will you involve the people in your community? In defining problems, needs, resources? Design, construction, maintenance, the technologies?
3. What problems do you anticipate regarding the introduction of any of the new technologies in your community?
4. Which technologies do you plan to introduce first, and why?
5 How do you think what you learned in this course can be applied in your community to improve health and promote self-reliance?
6. What does your "timeline" look like? By when do you hope to accomplish specific tasks mentioned above?
7. What advice would you give yourself relating to your role as a community worker?
|
| |||||||||||||||||||||||||||||||||||||||||||||
Solar and Energy Conserving Food Technologies: A Training Manual (Peace Corps, 1984, 175 p.)
Appendices
Calendar
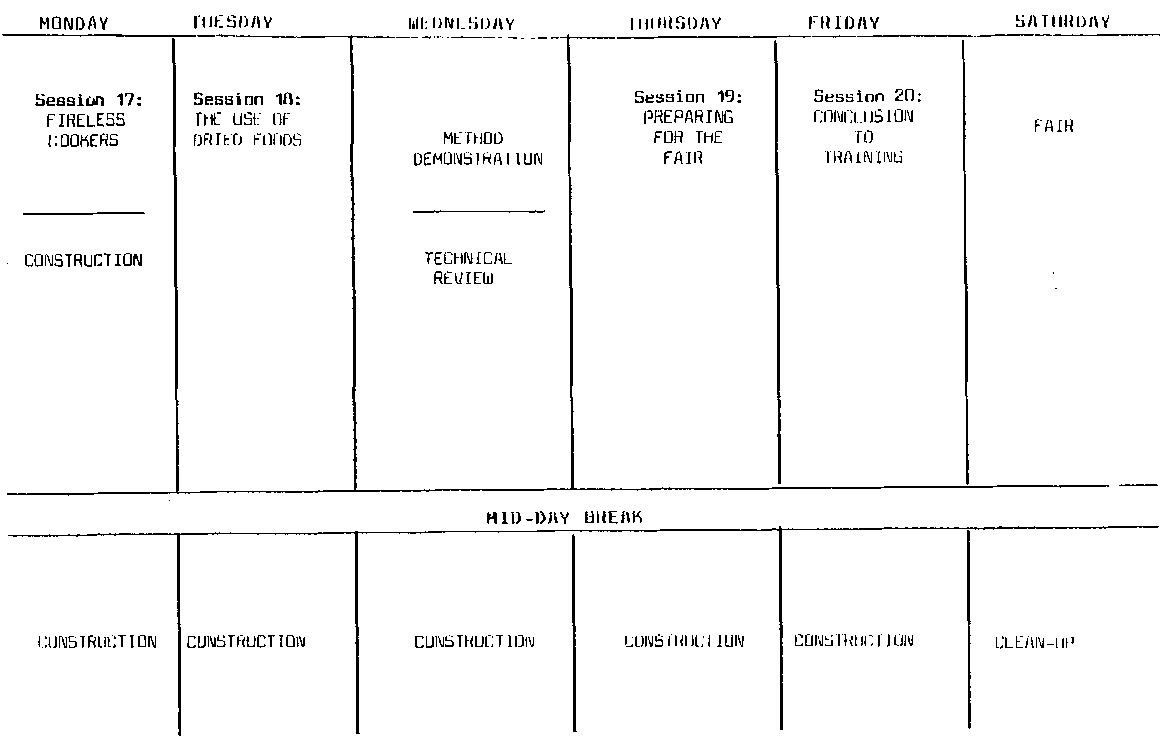
CALENDAR FOR WEEK 1

CALENDAR FOR WEEK
TWO
Description of training
Solar and Energy Conserving Food Technologies
There are two threads running through this training program: the technical theme of using the sun and other energy efficient technologies in the area of preserving, preparing and storing foods; and the application of the technical information as part of the community work that you are currently doing.
The main focus of the training program is to help Peace Corps volunteers and their counterparts be able to design, build, use and maintain improved food preservation and storage devices and fireless cookers. However, as important as the technical aspect of the devices is the "how" and the "why" of their application. A technology is useful and appropriate only when it is used as a tool to improve a community's health and self-reliance. It must build upon what people already know and help them address and solve their own problems.
It has been shown repeatedly that technologies that do not take people and culture into account are not particularly helpful, and are often doomed to fail. The world landscape is littered with such "innovations". Cut, when technologies are based on the use of local resources, both human and material, in order to meet community-defined needs, there is a good chance that they will succeed and flourish.
The training program is designed so that you will be able to apply what -and how - you learn during the course once you return to your community. We ask that you take an active part in your education and that you work in cooperation with others in the group to identify and use the talents and resources that are available. We expect that you will practice and continue to develop skills that help motivate people, promote their self-confidence, and contribute to their understanding of learning as a process of discovery.
The devices you will build will be as consistent as possible with the realities of conditions in the communities where you live and work. The criteria that will be used are:
- affordable and low in capital investment
- simple and
adaptable in scale and design
- easily understood by people with little or no
formal education
- responsive to local needs and conditions
- dependent on
available resources and skills
- able to be constructed, operated, maintained
and repaired by the users based on the use of renewable sources of energy
-
characterized by the potential to contribute to local cooperation, good health
and self-reliance.
The course is based on the principles of experiential learning and non-formal education. The teaching methods incorporate practical "hands-on" learning, guided and independent discovery, and the opportunity to learn from one another.
It is our intent to offer each participant the opportunity to learn new and useful information and to help spark a renewed sense of enthusiasm and discovery to share once the course has ended.
Sample memo to in-country staff
DATE
MEMORANDUM
TO: PTD, APCD
FROM: Ada Jo Mann, SPA Coordinator, OTAPS
SUBJECT: Solar and
Energy Conserving Food Technologies Workshop
The Workshop offered includes both theoretical and practical information and an opportunity to gain" experience in the technical and extension skills necessary to design and build devices and introduce them to local people. The following categories detail the proposed program:
1. Timing
a. The program requires two weeks so that participants are able
to design, build and use a preservation device and cook using preserved
food.
b. The program is designed to be delivered eight hours per day, Monday
through Friday, and four hours on Saturday morning.
c. Sessions are designed
to be delivered in two and four hour blocks of time, specifically, 8:00 A.M. -
Noon, and 2:00 - 6:00 P.M. Evening sessions are strongly discouraged.
d. The
program is approximately one-third technical, one third handson construction,
and one-third extension methodology.
2. The technical component of the program includes the following:
a. The advantages and disadvantages of traditional food
preservation and storage techniques and devices.
b. Design considerations for
appropriate preservation and storage devices.
c. Design, construction,
testing and modifications of various food preservation and storage devices, as
well as fireless cookers.
d. Design information on wood-fired, as well as
solar food dryers, and "other technologies" as defined by the participants.
3. The Extension Component includes the following:
a. Experiential learning theory and methods.
b. Non-formal
education theory and practice.
c. Effective techniques for introducing new
technologies.
d. Community assessment methods and practice.
e. Method
demonstrations.
4. Other sessions include:
a. Preparation of fruits and vegetables for drying.
b. The
rehydration of dried foods.
c. Cooking with dried foods.
d. Other relevant
sessions presented by the participants.
We will be sending a sample letter of invitation which you can send out to the potential participants of the program in order to clarify the content and purpose of the workshop. Please distribute these letters to potential participants at least three weeks prior to the beginning of the training program.
Sample letter to participants
NOTE: This letter should be sent via OPD/Peace Corps/Washington to incountry Peace Corps staff for distribution so it will arrive at least four weeks before the course is to begin.
TO: Participants in the Solar and Energy Conserving Food Technologies Workshop
FROM: The training staff (your names)
We are looking forward to being in (country) and leading what we anticipate will be an exciting and informative inservice training.
The training will provide you with technical information and skills in the design, construction and use of various food preservation, preparation and storage technologies. Although the focus is on solar food dryers and fireless cookers, there will be an opportunity to include other technologies, if there is interest and time available. In addition, the program will include information on various communication techniques and non-formal education teaching tools which have been used successfully in community development work. How to teach others what you learn at the workshop and how to motivate them to take action is a major theme of the program.
The course will include:
- Information on design and health considerations for food
technologies, with a main focus on solar dryers and fireless cookers
-
Design, construction, testing and adaptation of the different devices
-
Information on drying, storage and use of different food
- Theory and
practice of effective learning techniques
- Community needs and resources
assessment
- End-of-training event to share new information with local
communities
Please bring to the workshop as much information as possible on the following topics:
- Current and past food preservation and storage practices in
your area
- Specific problems and needs that food preservation and storage
know-how could address in your community
- Successes and/or failures of
previous food preservation and storage problems in your area
- Foods and cash
crops grown in your area; price variations during the year; times of excess and
shortage; methods of preservation and storage for each; information on family
gardens and meat production
- The potential for marketing preserved foods in your area
-
Leather patterns (rainfall, temperatures, humidity) on an annual basis
-
Locally-available tools and construction materials, their cost and
durability
- Other information you think may be relevant to the workshop
We'd also like you to contribute ideas and suggestions to make the workshop as practical as possible. Try to bring teaching aids and ideas you've used or that you want to improve, slides or photos of your community and project (including food preservation and storage techniques) and samples of preserved foods.
Should you know of resource people who would be available to share their skills and knowledge pertaining to the workshop with us, please contact.
By the way, don't forget to bring your workclothes. Remember that a good part of the workshop will be dedicated to construction.
We hope to see you soon.
SOLAR AND ENERGY CONSERVING FOOD TECHNOLOGIES: An
Annotated bibliography
All materials listed can be obtained either through the Information Collection and Exchange (ICE) or OTAPS/Peace Corps. The starred listings are recommended texts and materials; others may be included in a resource library during the training program.
Technical Materials
* Appropriate Technology Source Book, Vol. 1,2, Darrow, K. & R. Pam, Vol.in Asia.
A Survey of Solar Agricultural Dryers - Report T99, Dec. 1975.
This Survey contains the history, use, plans and drawings of solar dryers from throughout the world. Locally designed and built dryers are of special interest. Full of technical data and useful drawings and plans.
* FAO Economic and Social Development Series - Rural Home Techniques, Home Economics and Social Programs Service - FAO, United Nations, Rome, Italy.
This is an illustrated trilingual (French, Spanish, English) series of pamphlets relating to low-cost food preservation and storage methods, sanitation and water supply, and Fireless Cookers. It includes simple, easyto-follow instructions under each category.
* Fireless Cookers
This well-written book gives thorough information on the history, construction and use of Fireless Cookers.
* Small Farm Grain Storage.
A complete manual on solar dryers, back-up heaters, improved storage devices and enemies of stored grain. Good information on control of insects and rodents. Full of clear drawings, charts and plans.
Improved Food Drying and Storage Training Manual, Peter Zweig, et. al., CHP International - U.S. Peace Corps/ICE.
This manual has a technical focus on solar food drying and storage, particularly grains and legumes. It also emphasizes the importance of applying technical information as an integral part of community development.
Postharvest Food Losses in Developing Countries.
An excellent book describing food losses and how to control them. Complete with photographs of improved storage devices from around the world. Focus on using low-cost improvements which utilize local materials and resources.
Solar Food Dryer Plans, Rodale Press, Emmaus, Pennsylvania.
Complete and easy-to-read information about solar drying, including considerations of health, nutrition, and economics of building your own dryer.
Technical Materials (continued)
- Preserving Food by Drying. A Math/Science Teaching Manual (Manual #M-10).
A very good teaching manual for people involved in education at the junior high or high school level. Describes the physics of solar energy design and the physiology of dried foods, health and nutrition.
Proceedings of the Solar Dryer Workshop, Manila, Philippines, 1978.
Focus of this book is the drying of foods in humid tropical regions of the world. More technical, less practical.
* Putting Food By, Ruth Hertzberg et.al., Stephen Green Press, Lexington, Mass., 1.
A readable, easy-to-use "how-to" book on food preservation technology which includes drying, pickling, canning, freezing, smoking and brining. It also gives health and nutrition related information, recipes for using the preserved foods, and suggestions for proper food storage.
Village Technology in Eastern Africa.
Focus on improving health and nutrition of women and children through the use of appropriate technologies. Short section on solar dryers and improved food storage devices.
Education and Community Development Materials
* Audio-Visual/Communications Teaching Aids Resource Packet. P-8, Peace Corps Information Collection and Exchange.
A compendium of materials to help in the development of a variety of teaching tools. It is an excellent resource.
* Bridging the Gap: A Participatory Approach to Health and Nutrition Education, Save the Children, 54 Wilton Rd. Westport CT 0688D, 1982.
A series of community development and nutrition education activities that use imagination and variety to present information and involve people in their own education.
* Child Nutrition in Developing Countries, Jellife, D.B., AID/Dept. of State.
From the Field: Tested Participatory Activities for Trainers, compiled by Catherine D. Crone and Carman St. John Hunter, World Education, 1414 Ave. of the Americas, New York, NY 10019, 1980.
Useful activities and training materials for community development workers involved in training courses.
Health Education Training Model, L. Goldman, Hesperian Foundation Peace Corps/ Education and Community Development Materials
Helping Health Workers Learn, David Werner and Bill Bower, the Hesperian Foundation, P.O. Box 1692, Palo Alto, CA 94302, 1981.
Although the focus of this excellent book is on health, it has many applications for all kinds of community work and training programs. It can be used to prepare for and carry out a short course, or as a general resource for community education.
The New Games Book, Andrew Fluegelman, the New Games Foundation,
Headlands
Press, Garden City, NY, 1976.
Playfair: Everybody's Guide to Noncompetitive Play Matt Weinstein and Joel Goodman, Impact Publishers, San Luis Obispo. CA; distributed by Sagamore Institute, 110 Spring St., Saratoga Springs NY 12866.
Both books are treasure chests of ideas for working with groups in ways that promote cooperation and creativity.
Perspectives on Non-formal Education, Lyra Srinivasan, World Education, 1414 Ave. of the Americas, New York, NY 10019.
Useful information and ideas about applying the principles of non-formal education.
* The Photonovel: A Tool for Development, Daniel Weeks, ICE/Peace Corps.
A "how-to" book developed by a former Peace Corps Volunteer and media professional. A valuable resource for those who want to try a new and exciting way of sharing technical information. It is a kind of comic book approach that has been very successful throughout the world.
Training Manual, Appropriate Community Technology, Farallones Institute for Peace Corps/Energy Sector/OTAPS
Materials in solar technologies (water heaters, dryers and others), pedal and treadle powered devices, fuel conserving cookstoves, health and nutrition, community development, cross-cultural training. A useful resource for planning and carrying out a training program, or for locating technical information about alternate sources of energy, and the application of new technologies on a community level.
*Two Ears of Corn: A Guide to People-Centered Agricultural Development, Bunch, Roland, World Neighbors (distributed by the Hesperian Foundation).
It is not necessary to be directly involved with agriculture to benefit from this excellent book. It discusses ways of involving people in the development process, and gives examples and nuggets of inspiration along the way.
SOLAR AND ENERGY CONSERVING FOOD TECHNOLOGIES: A Resource List
Information Collection & Exchange Peace Corps 806 Connecticut Ave., N.W. Washington, D.C. 20526 (for program and training Journals, appropriate technology information, variety of publications and materials)
Farallones Institute Rural Center 15290 Coleman Valley Road Occidental, CA 95465 (information about appropriate technology, education, community development)
Aprovecho Institute 359 Polk Street Eugene, OR 97402 503-929-6925 (fuel conserving stoves)
Community Environmental Council 924 Anacapa St., Suite B4 Santa Barbara, CA 93101 (drawings, publications, information)
Institute for Local Self-Reliance 1717 18th St., N.W. Washington, D.C. 20009 (charts, drawings, publications, information)
New Alchemy Institute 237 Hatchville Rd. East Falmouth, MA 02536 (information and journal)
Appropriate Technology International 1724 Massachusetts Ave., N.W. Washington, D.C. 20036 202-293-9270 (funding and information for Third World groups)
Food and Agricultural Organization of the United Nations Rome,
Italy
(How-to pamphlets on food preservation, storage and use in English,
French and Spanish)
Hesperian Foundation P.O. Box 1692 Palo Alto, CA 94302
415-327-4576
(Health, community education and teaching ideas)
Volunteers in Technical Assistance 1815 N. Lynn St. Suite ZOO Arlington, VA 22209 (monthly newsletter, technical assistance service and VITA Village Technology Handbook, in Spanish and English)
Appropriate Technology Project Volunteers in Asia Box 4543
Stanford, CA 94305
(excellent Appropriate Technology Sourcebook to get you to
what you are looking for)
Intermediate Technology Development Group 9 King St. London WCQE
8HN ENGLAND
(quarterly Journal of Appropriate Technology which includes
information on publications, innovations and good ideas)
Transnational Network for Appropriate Technologies (TRANET) P.O. 90x 567 Rangeley, ME 04970 (excellent networking and ideas-oriented newsletter)
Vecinos Mundiales/World Neighbors 5116 North Portland Avenue Oklahoma City, OK 73112 (quarterly magazine and other publications in Spanish, English, and French; excellent for material on work you might do in community development)
Brace Research Institute McDonald College of McGill University
Ste. Anne de Bellevue, P.Q.
HOA 1CO Canada (lots of technical information)
Canadian Hunger Foundation 75 Sparks Street Ottawa, Ontario KIP 5A5 Canada (last two groups have jointly published A Handbook in Appropriate Technology)
Technical Assistance Information Clearinghouse (TAICH) ZOO Park Avenue, South New York, N.Y. 10002 (newsletter on world issues)
Whale Earth Truck Store 558 Santa Cruz Avenue Menlo Park, CA 94025 (bibliography list and mail order of anything, almost')
Materials list
NOTE: Materials used in construction should be low-cost and readily available in the participants' areas. Therefore, the following list should be used by the Trainer as a guide. Amounts of each material needed are not included here, as they will vary according to the particular needs of each group.
A request list for materials and tools can be developed based on this shopping list. During the course it will simplify the purchasing and locating of necessary supplies if each participant anticipates the items that will be necessary for construction projects.
Materials and Tools List
|
Materials |
Size/Amount |
Unit Cost |
|
Mudblocks | |
|
|
Cement, | |
|
|
Sand | | |
|
Gravel | | |
|
Clay | | |
|
Chicken wire |
| |
|
Clear polyethylene or polyvinyl | | |
|
Black polyethylene or polyvinyl | | |
|
Glass | | |
|
Acrylic | |
|
|
Window screen, non-toxic | | |
|
Mosquito netting |
| |
|
Wire, thin | |
|
|
Twine, | | |
|
Bush Rope | |
|
|
Nails: 3cm 5cm 8cm |
| |
|
Paint, black |
| |
|
Paint, white |
| |
|
Corrugated metal roofing | | |
|
Corrugated fiberglass roofing | | |
|
Lumber: 1" x 6", 2" x 2" | | |
|
Large baskets, tightly woven, with lids | |
|
|
Bush poles | |
|
|
Bamboo poles |
| |
|
Reeds | | |
|
Calabashes | |
|
|
Tins with sealable lids | | |
|
Jars with sealable lids | | |
|
Cardboard boxes, 1/4 - 1 cubic meter | |
|
|
Wood putty | |
|
|
Sealing wax |
| |
|
Sulfur (suitable for sulfuring fruit) | |
|
|
Masking tape |
| |
|
Wood glue | |
|
|
Local insulation materials (wood shavings, dried grass) |
| |
|
Cooking pots with tight-fitting lids, various sizes | | |
|
Tools |
|
Shovel |
|
Saw, crosscut and rip |
|
Hammer |
|
Pliers |
|
Tin snips |
|
Trowel |
|
Paint brush |
|
Bucket, plastic or metal |
|
Wood chisel |
|
Tape measure, 2 meter length |
|
Wood file |
|
Thermometers, for air |
|
Paring knives |
|
Bubble level |
|
File for sharpening machetes |
|
Large scissors |
Ideas for evaluation
There are many ways to evaluate a training program. It is up to you and the participants to decide on the most useful methods. You will probably want to evaluate the course content and format, staff participation, and the group members' progress. Whatever methods you select, the most important thing to remember is that the purpose of an evaluation is to find out how effective the training program is, and to look for ways to improve it. The evaluation process should be two-way between staff and participants; it should include a variety of methods, and be used periodically so that suggestions for improvement can be incorporated.
SUGGESTED DAILY EVALUATION ACTIVITIES:
1. At the end of a session, spend a few minutes to review the objectives that were to be accomplished. Ask for comments and suggestions for improvement.
2. At the end of the day's activities, staff and participants anonymously write several positive comments about the day, several negative ones, and some suggestions for improvement. The papers are collected and put in a bag. Each person draws a paper from the bag, and in turn, reads the positive comments. The process is repeated with the negative statements, and with the suggestions for improvement. Someone may keep a tally of the kinds of comments that were given. At the end of the evaluation, lead a discussion to elicit opinions on the program so far, and deal with any areas of concern that should be addressed.
3. In small groups, staff and participants list what they understood was to be accomplished during the day. Then, each group makes two other lists of what they believe went well and what could have been done better. The groups meet and share the lists, then discuss how the evaluation results will be applied to the next day's activities.
SUGGESTED PERIODIC AND FINAL EVALUATION ACTIVITIES:
1. Participants fill out a "report card" on the activities over a period of time, giving high marks, low marks and suggestions for improvement for each session or other activity. Post the "report cards" and discuss them.
2. Write each of the following questions on a separate envelope and post them:
- What did we get done that you hoped we would accomplish?
-
What did you learn that you didn't expect to learn?
- What were some
outstanding things about the week (or training)?
- What were some
not-very-good things about the week (or training), and how could they be
improved?
Provide slips of paper for people to use for comments to be put in each envelope. Later, review the comments with the group.
3. The participants evaluate your performance as a trainer, using the checklist on pages 9-17 of Helping Health Workers Learn and using the following points for consideration:
- Ability to effectively communicate information
- Apparent
knowledge of subject matter Methodology used
4. The participants develop and answer a number of questions to evaluate the training program, then discuss their comments.
5. Divide a large sheet of newsprint into quadrants with a marker. In the upper left, write "Your Expectations of the Training Program"; in the upper right, "A Problem that faced the Group During Training"; in the lower left, "How We Resolved the Problem"; and in the lower right, "A Hope for the Future."
Distribute sheets of paper and ask the group to make drawings to represent the four areas. When the activity is done, everyone posts their drawing and explains it to the rest of the group.
This exercise may be modified by changing the headings on the newsprint sheets as appropriate to your program.
6. Each member of the group writes a brief message to each of the other people on a slip of paper, mentioning a positive quality that he or she admires about the other person. As an option, on the other side of the paper, they may write a suggestion as to how the person might improve their teaching skills. An envelope with each person's name is posted, and the slips of paper put in the proper envelopes. The "telegrams" in their envelopes are distributed for people to read when and where they wish.
7. Distribute a questionnaire to evaluate the week's sessions. Write the title of the session, and next to it a scale from "not useful" to "very useful" plus room for comments. Ask the participants to rate each session, then review the evaluations with the group. A variation of this is a general questionnaire used at the halfway point or at the end of the training program. (Choose from the suggested questions or make up your own). Discuss evaluations with the group.
SAMPLE EVALUATION QUESTIONS:
1. What technical information presented this week would you like to have reviewed during the next week?
2. What is your opinion of the training site?
3. Are you satisfied with the hours of the training program? If not, please make suggestions for improving it.
4. What comment do you have regarding tools and materials?
5. What do you think of the course content?
6. What is your opinion as to applicability of the Solar Food Dryer in rural communities?
7. Please comment on the performance of the trainers as far as their preparation, organization, knowledge of subject area, ability to communicate information, etc.
8. What did you learn that you didn't expect to learn?
9. What comments do you have regarding the group of participants?
10. What suggestions do you have for improving the course, either during the second week or for future training programs?
11. What are your expectations for the second week of training?
12. What suggestions do you have for improving the method of evaluation?
13. Please make any comments regarding the effectiveness of the committees so far.